
Temporary Immersion Micropropagation


The newly devised temporary
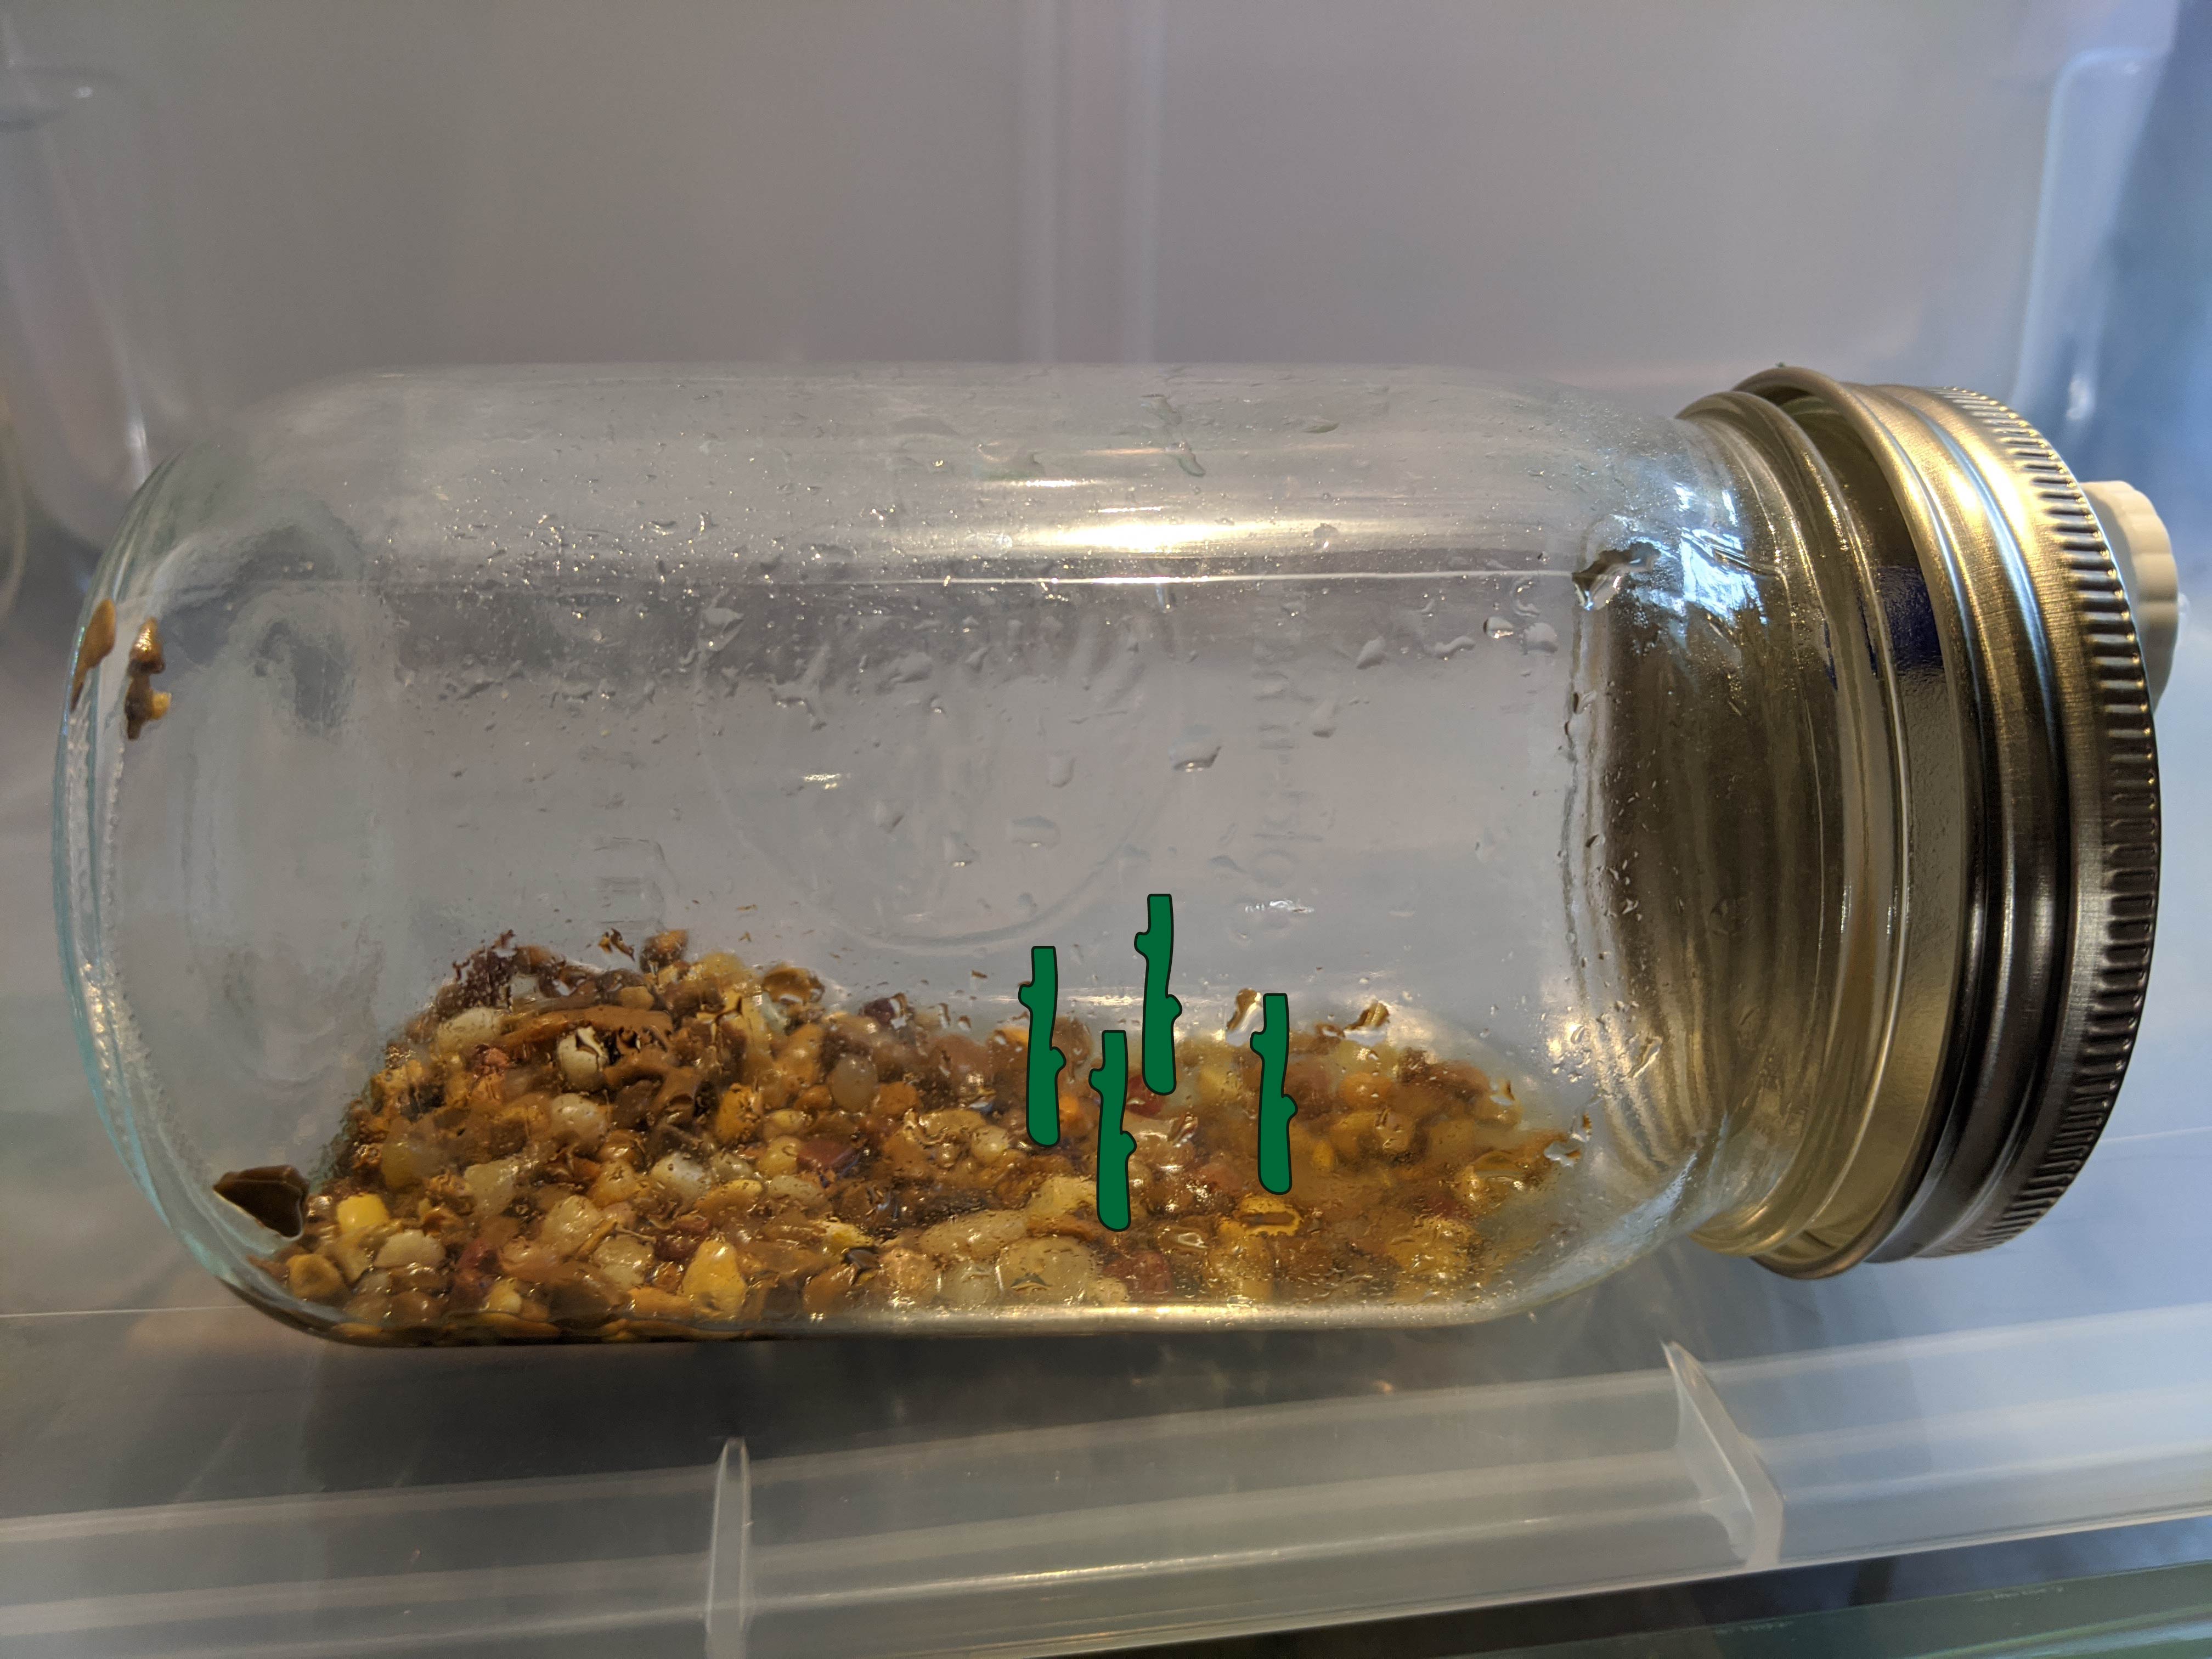
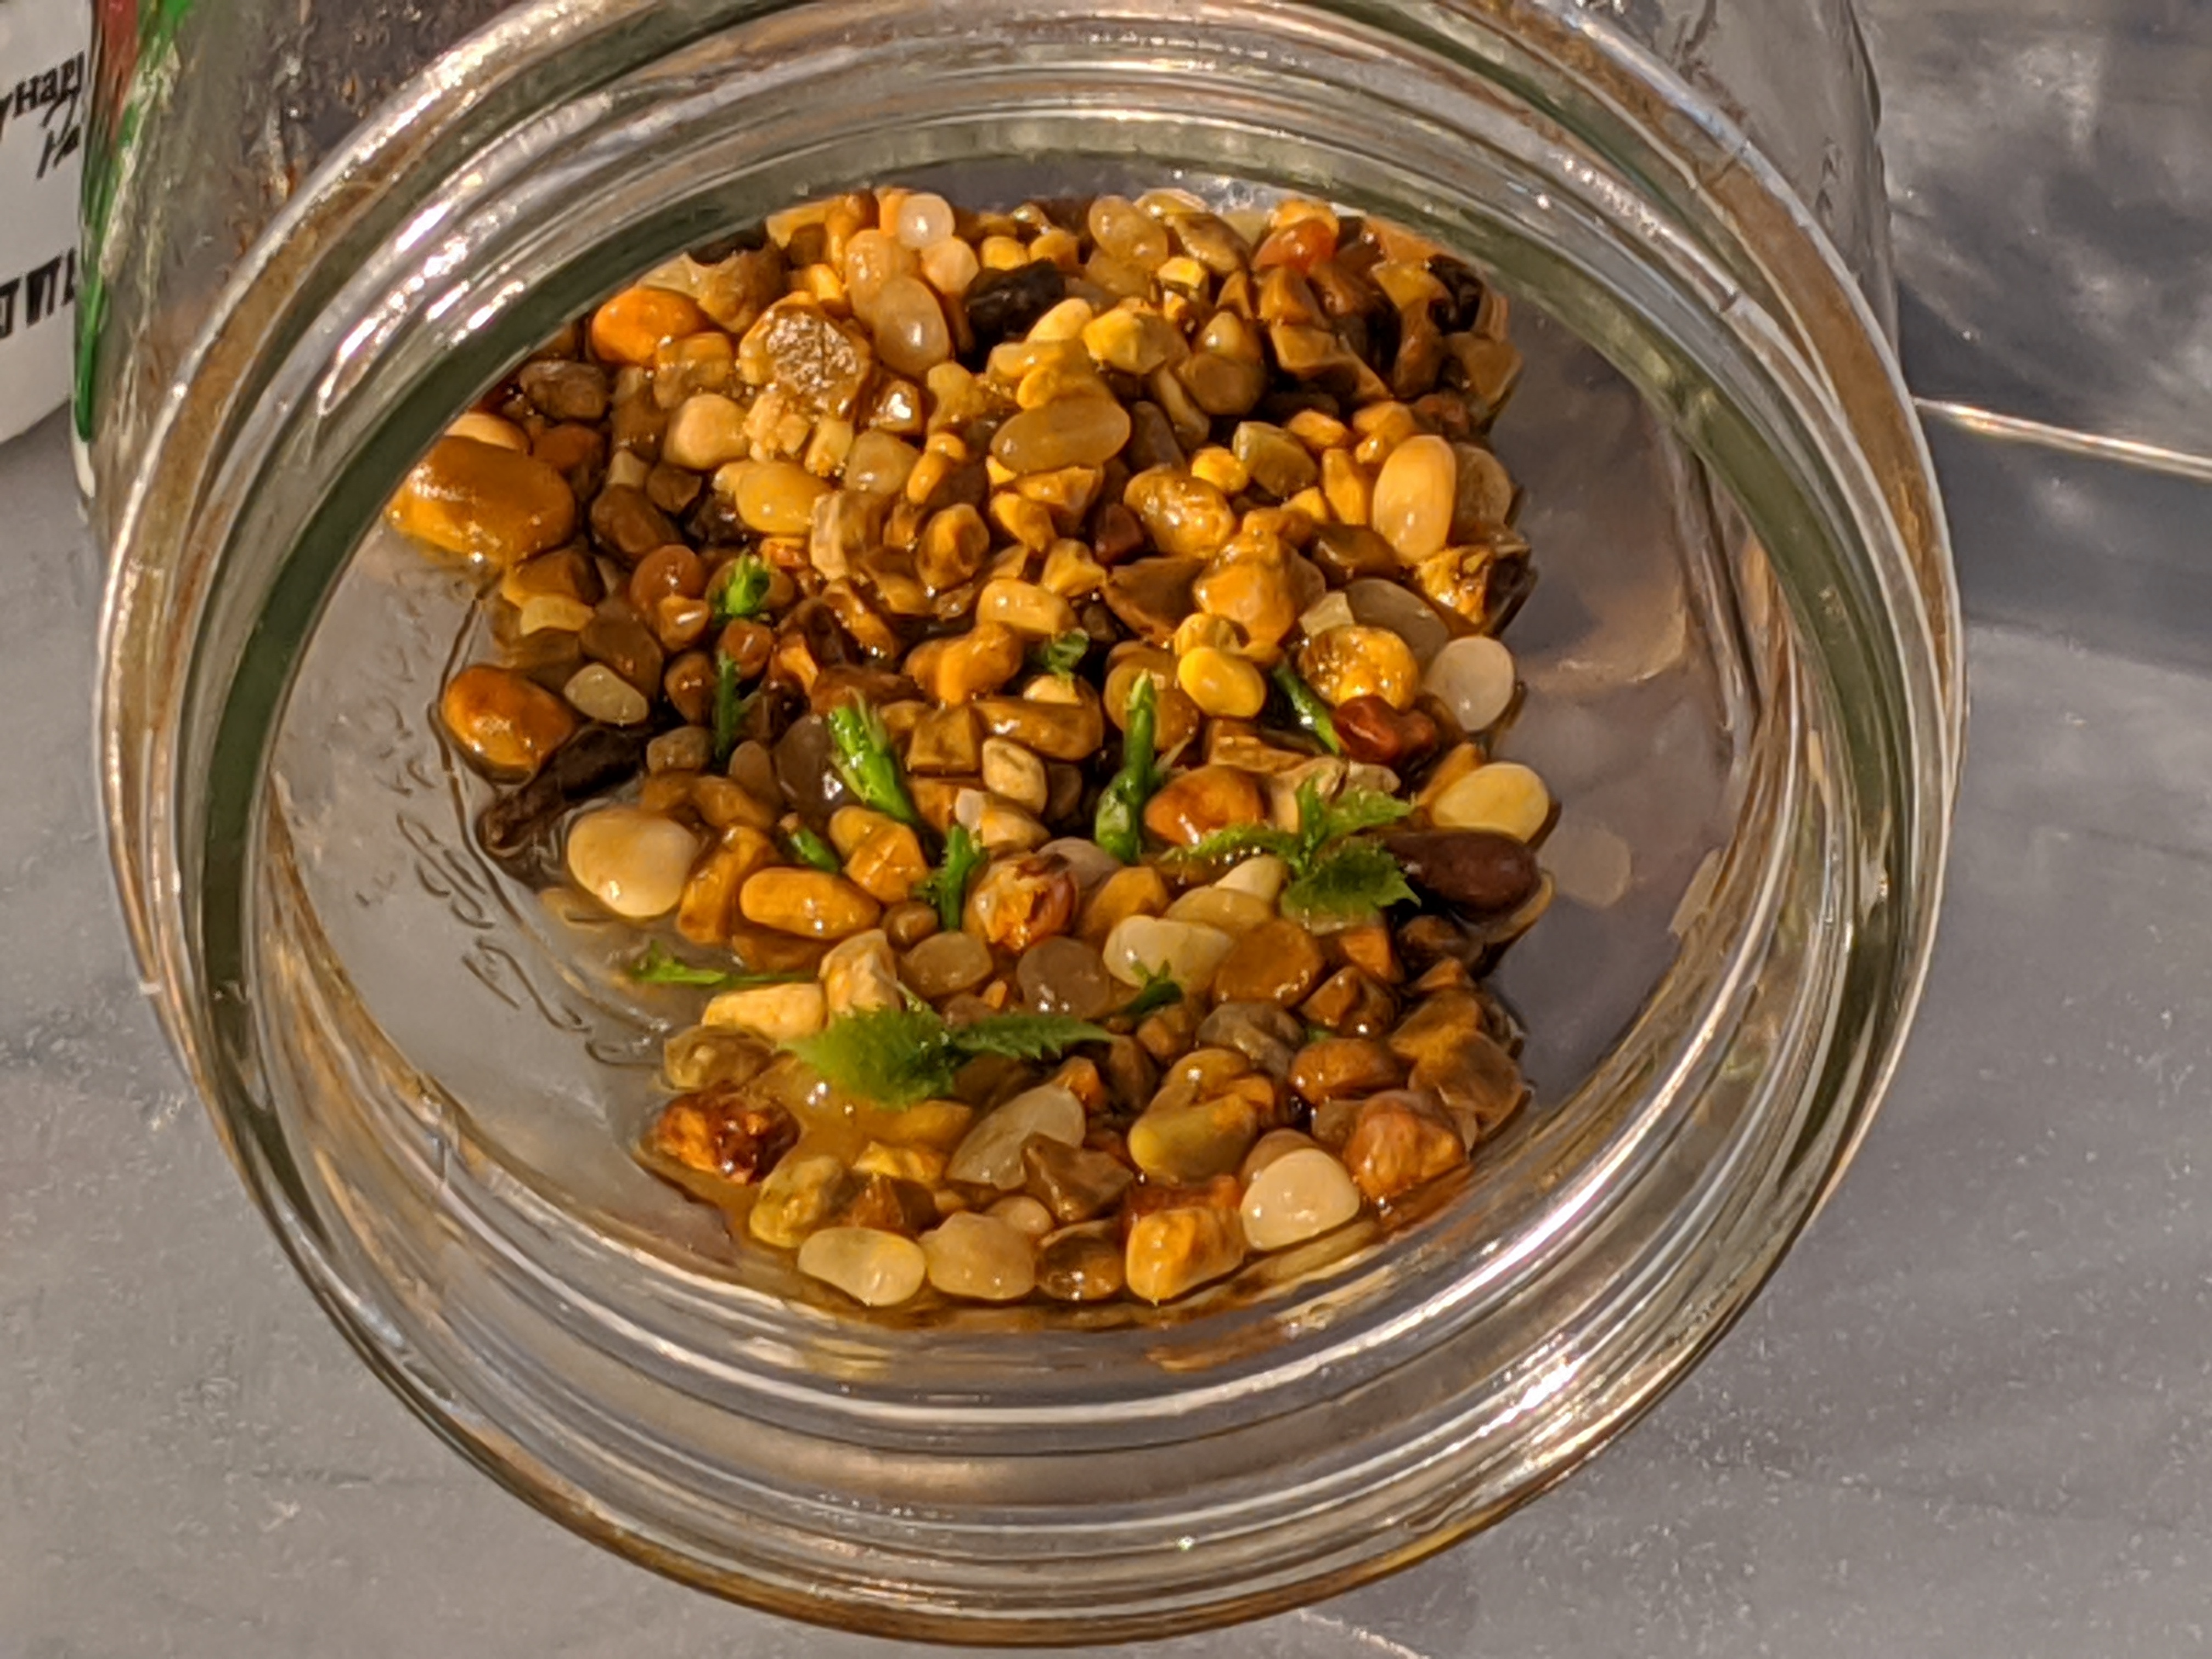
immersion system relies on a large mouth mason jar
with a thin layer of pebbles to hold the explants in
place. A small amount of nutrient fluid bathes the
explants when the jar is on its side, and the jar is
tipped automatically to drain the nutrient solution
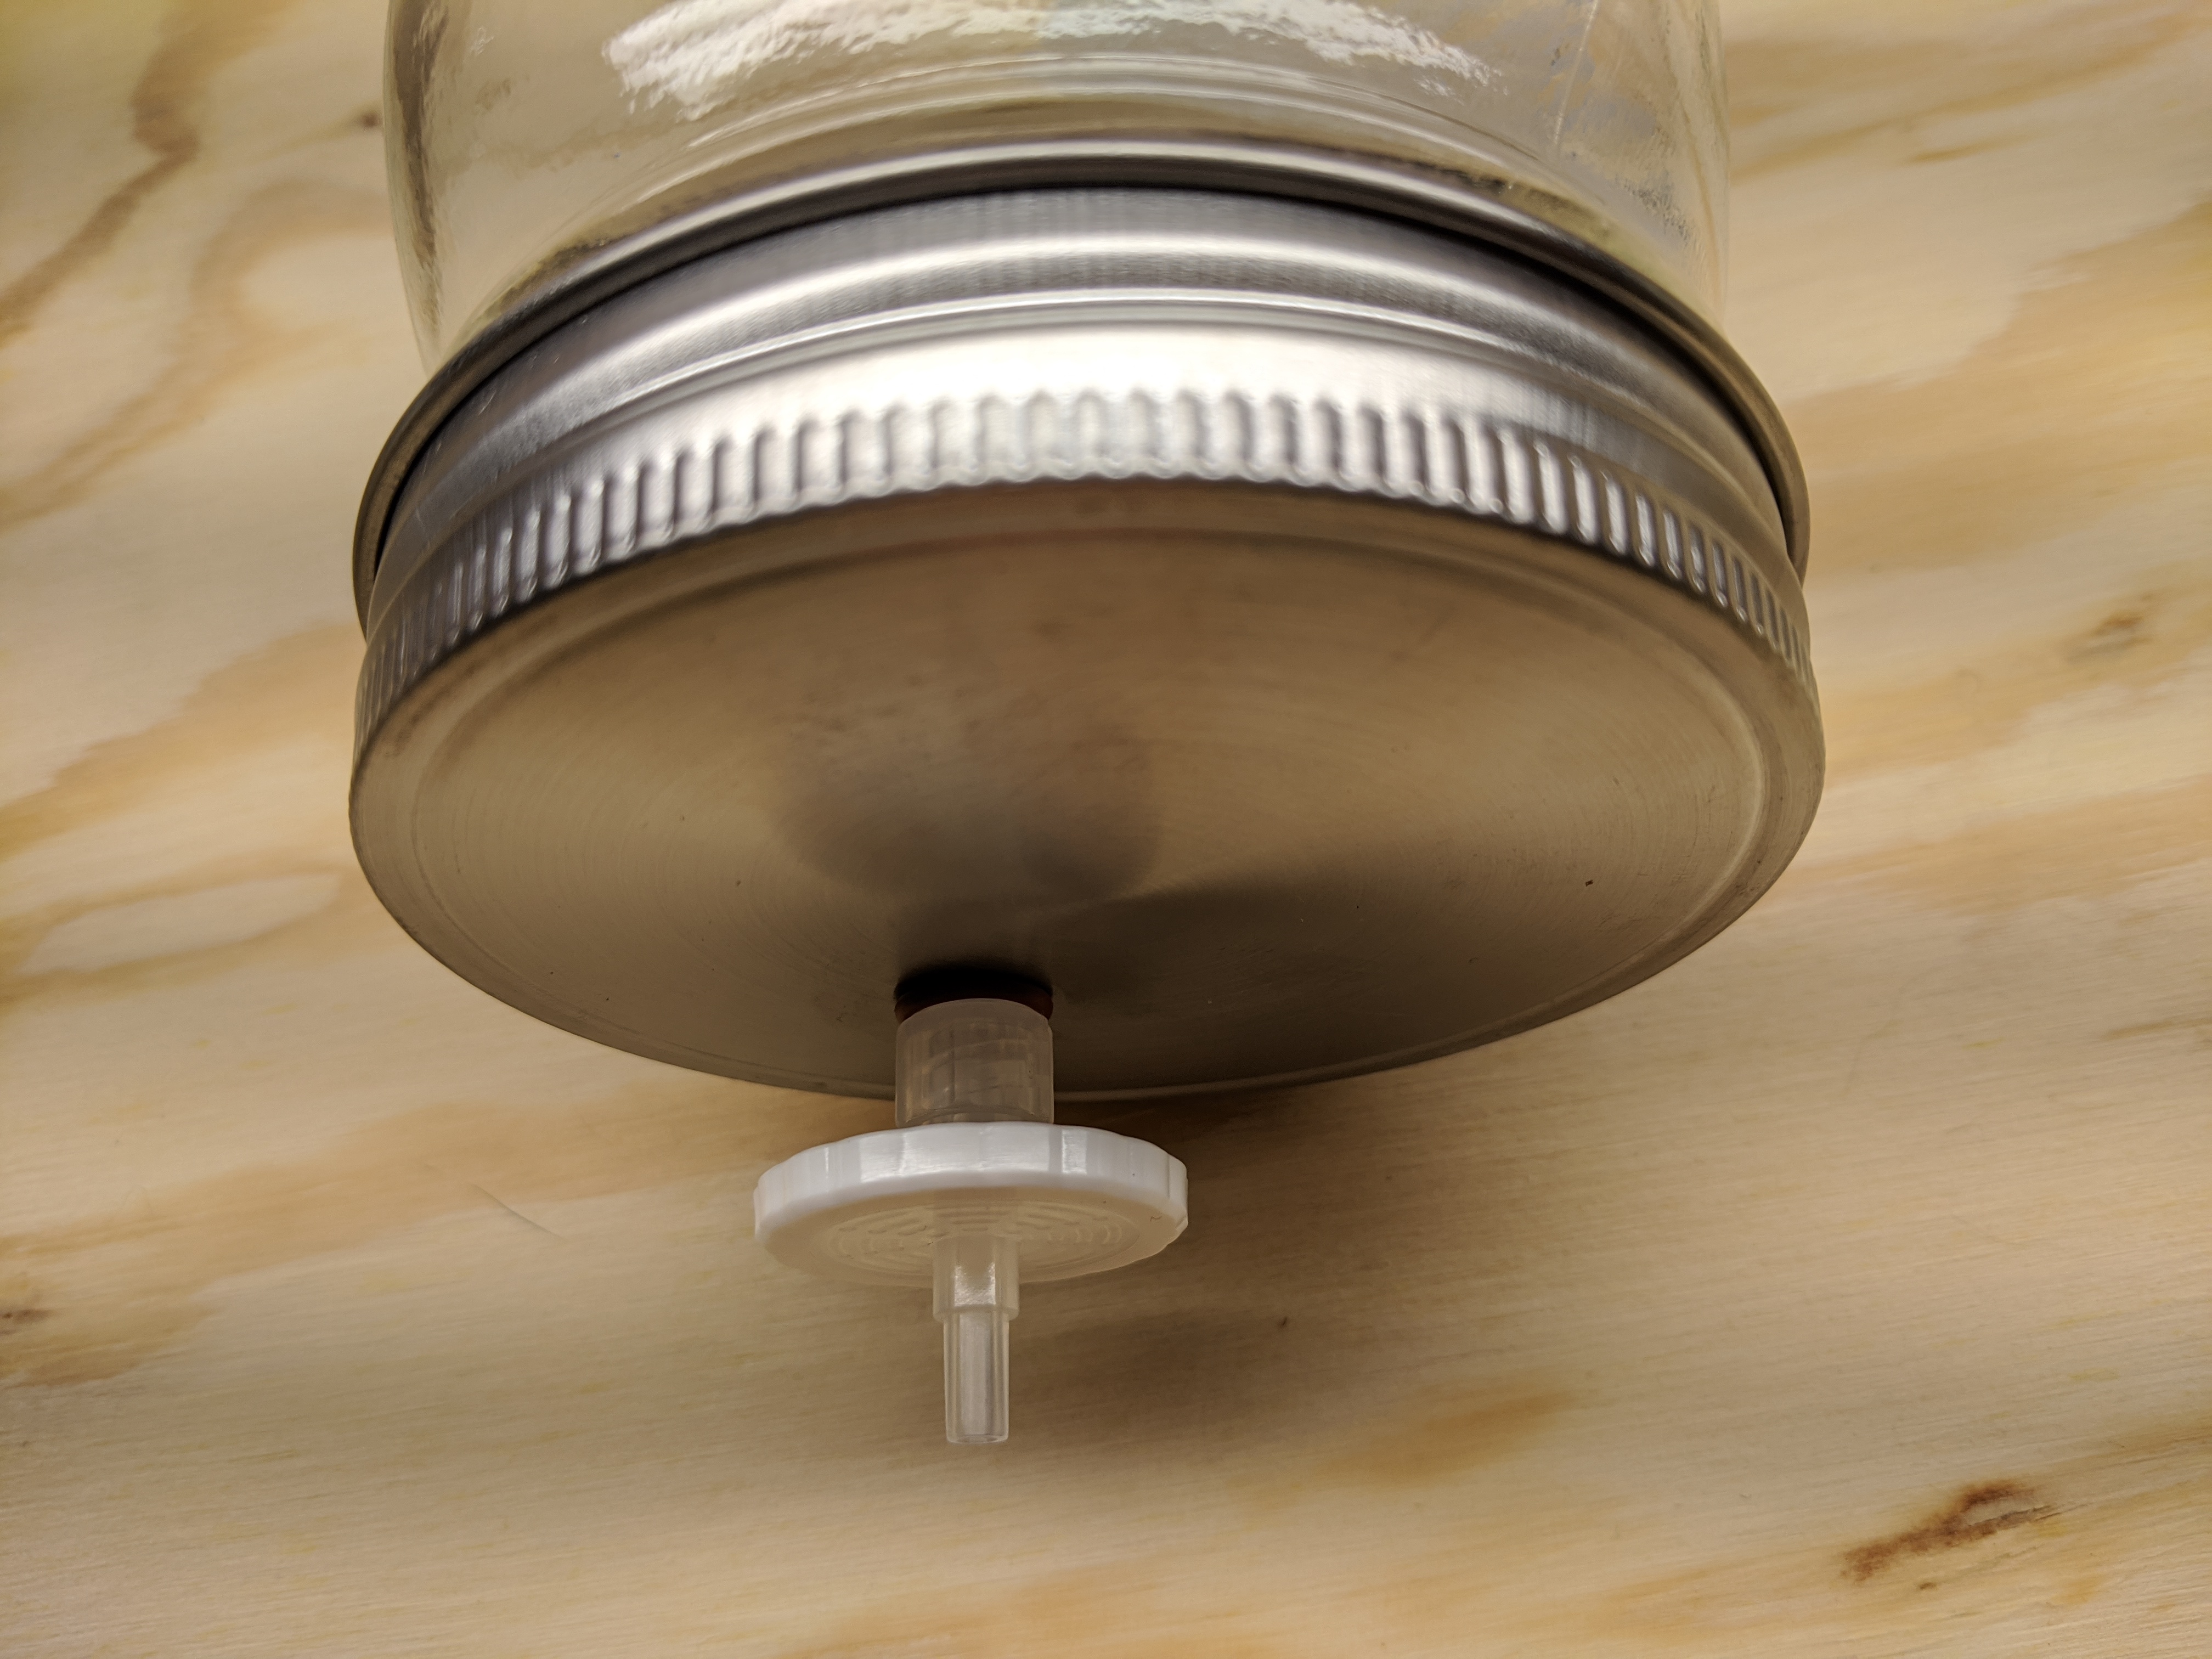
away from the explants. A 0.22 micron filter allows
gas exchange while maintaining sterility.
Jar on Side Floods Explants with Nutrient
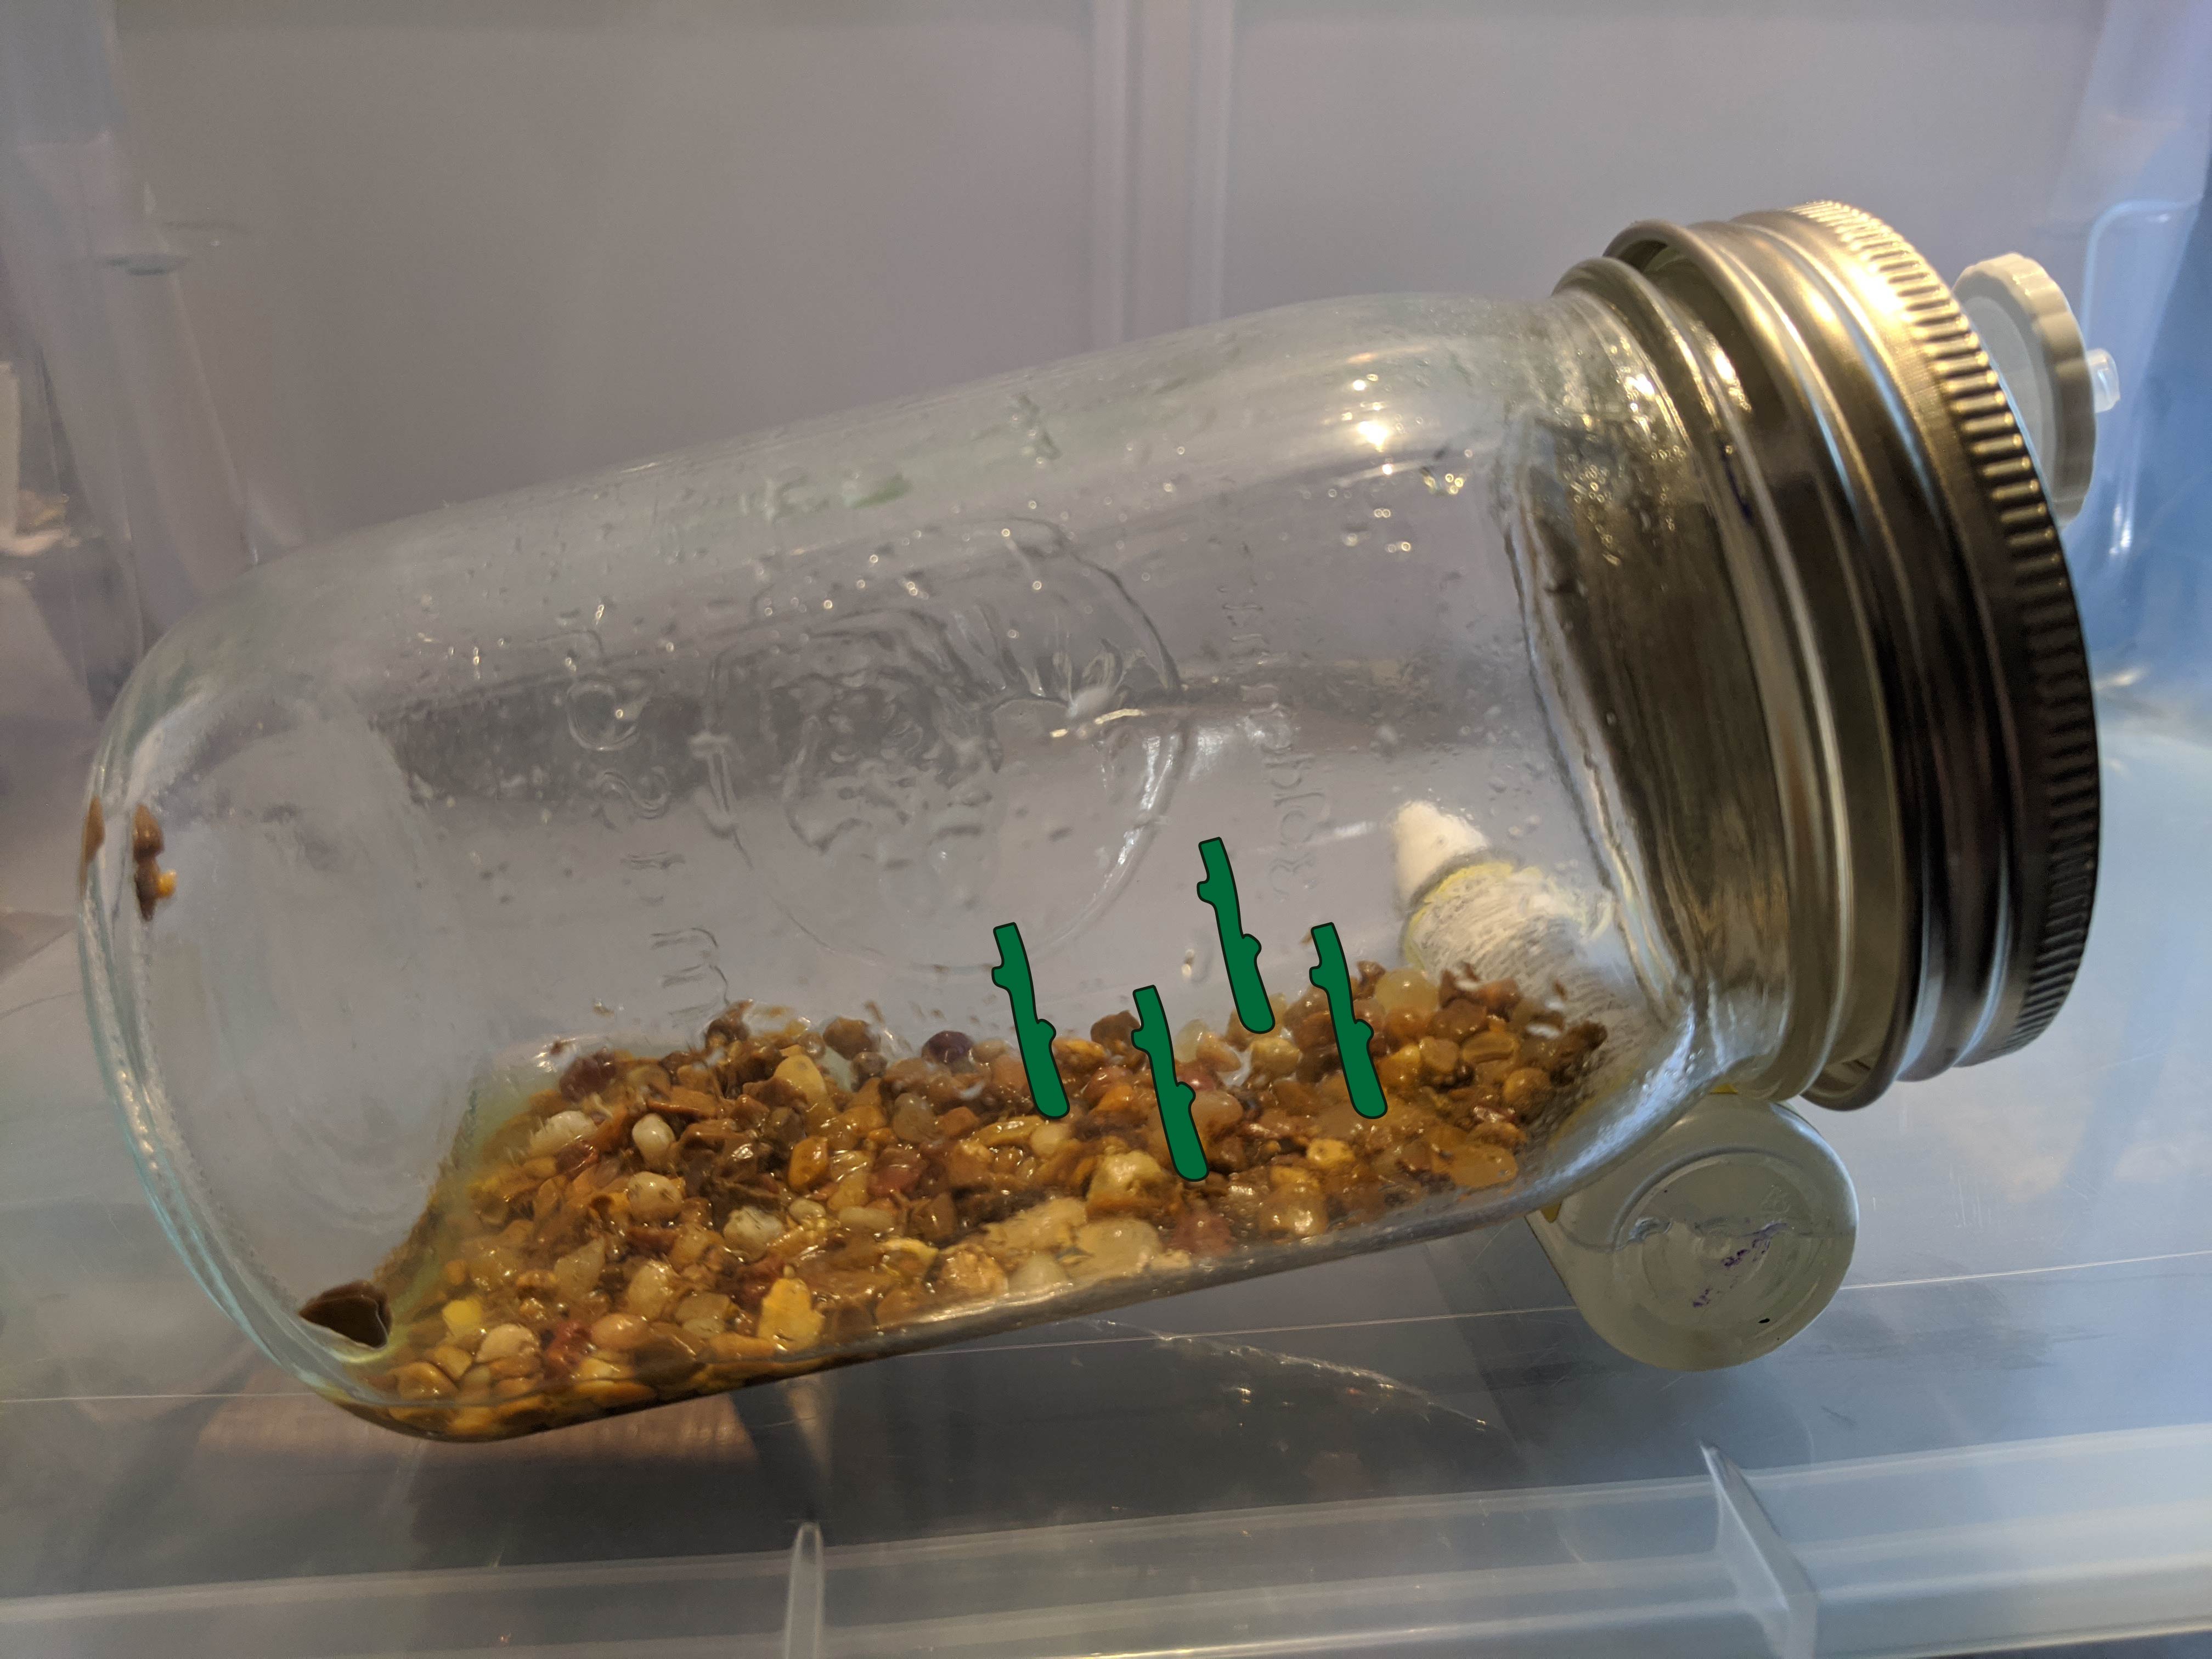
Tipped Jar
Causes Nutrient to Recede
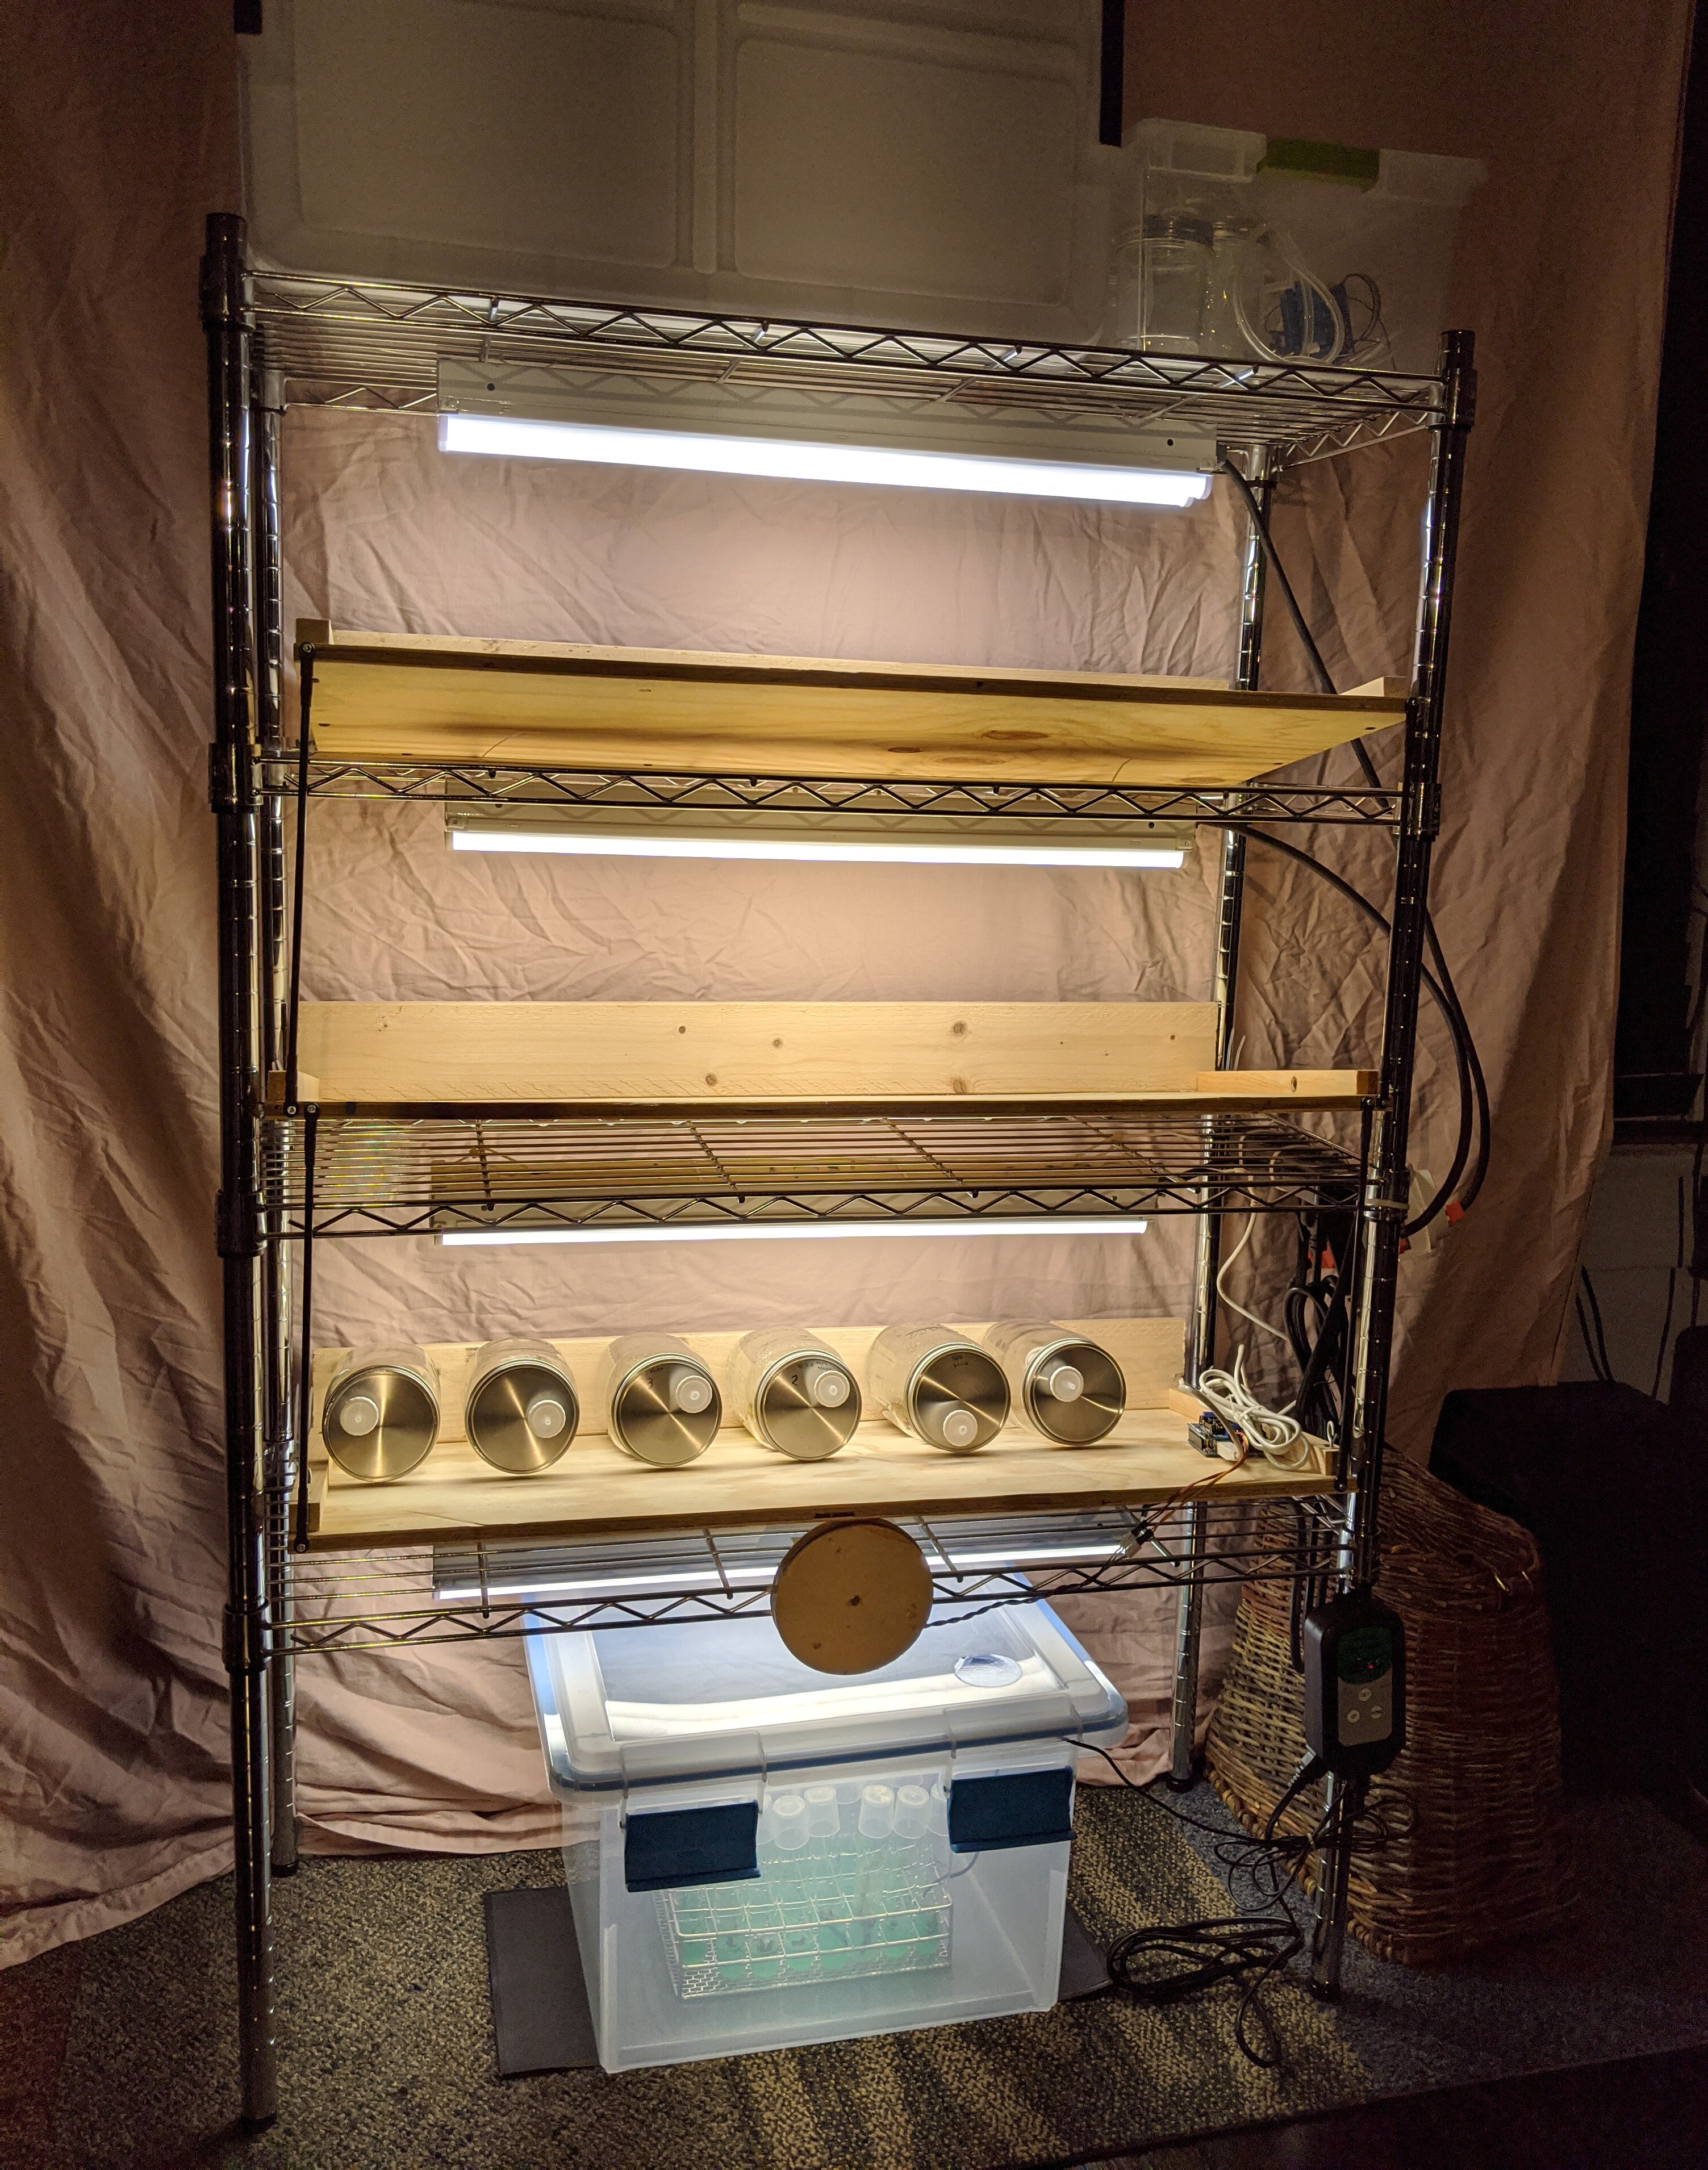
A tipping rack is made of wood and mounted
on a heavy duty wire shelf with a fulcrum anchored at one
side and a the other side raised by a motor. The motor is
controlled by an Arduino microprocessor that can be
programmed to specify customized tilt time and immersion
time. Multiple tipping tables will be linked to one motor
drive unit within a single 3 to 5 level shelf. This will
accomodate 8 jars per shelf, and up to 15 jars per shelf if
jars are stacked.
The
tipping rack automatically reclines and inclines on a
preset timing interval
Materials and
Equipment:
Pebbles - for holding explants in place
Stainless
Steel Lids - normal lids will rust
1/8"
Luer bulkhead adapter - filter attachment
1/4"
O-ring for sealing bulkhead adapter
32" x 14" x 1/2" plywood - for tipping shelf
1" x 4" x 8' pine board - for tipping shelf
3" screws
Stepper Motor Mounting Bracket
2" x 1/8" aluminum bar - for mounting motor
Traxxas ball joints - lift arm joint
M4 x 20mm set screws - lift arm
4" to 5" hole saw - cutting lift/drive wheel (a
jigsaw would also work here)
We Vitro Bioreactor -
this bioreactor would also work and may be preferable to mason jars because you can more easily manipulate plantlets from above.
Cost:
The cost of the
shelving, lighting, and tipping mechanisms for three
levels of tipping shelves is about $270.00, with almost
$190.00 in the wire shelf and LED lighting, which you
would need for static gel culture anyway. Cost for each
bioreactor is just over $7.00 ea. With a maximum of 45
bioreactors per shelving unit ($315.00 in bioreactors).
Assembly
Instructions:
Begin by
assembling the wire shelf, placing the bottom shelf 16
inches from the ground. Place the subsequent shelves 12
inches apart. The last shelf should be nearly at the top.
This will allow you to store supplies or static cultures
below the bottom shelf and have 3 tipping shelves.
LED lights require
being wired to a chord and plug and then can be zip-tied
in a central position under each of the top 3 shelves.
Chords can be made different lengths to accommodate
varying heights of shelves so you don't have to deal with
extra chord.
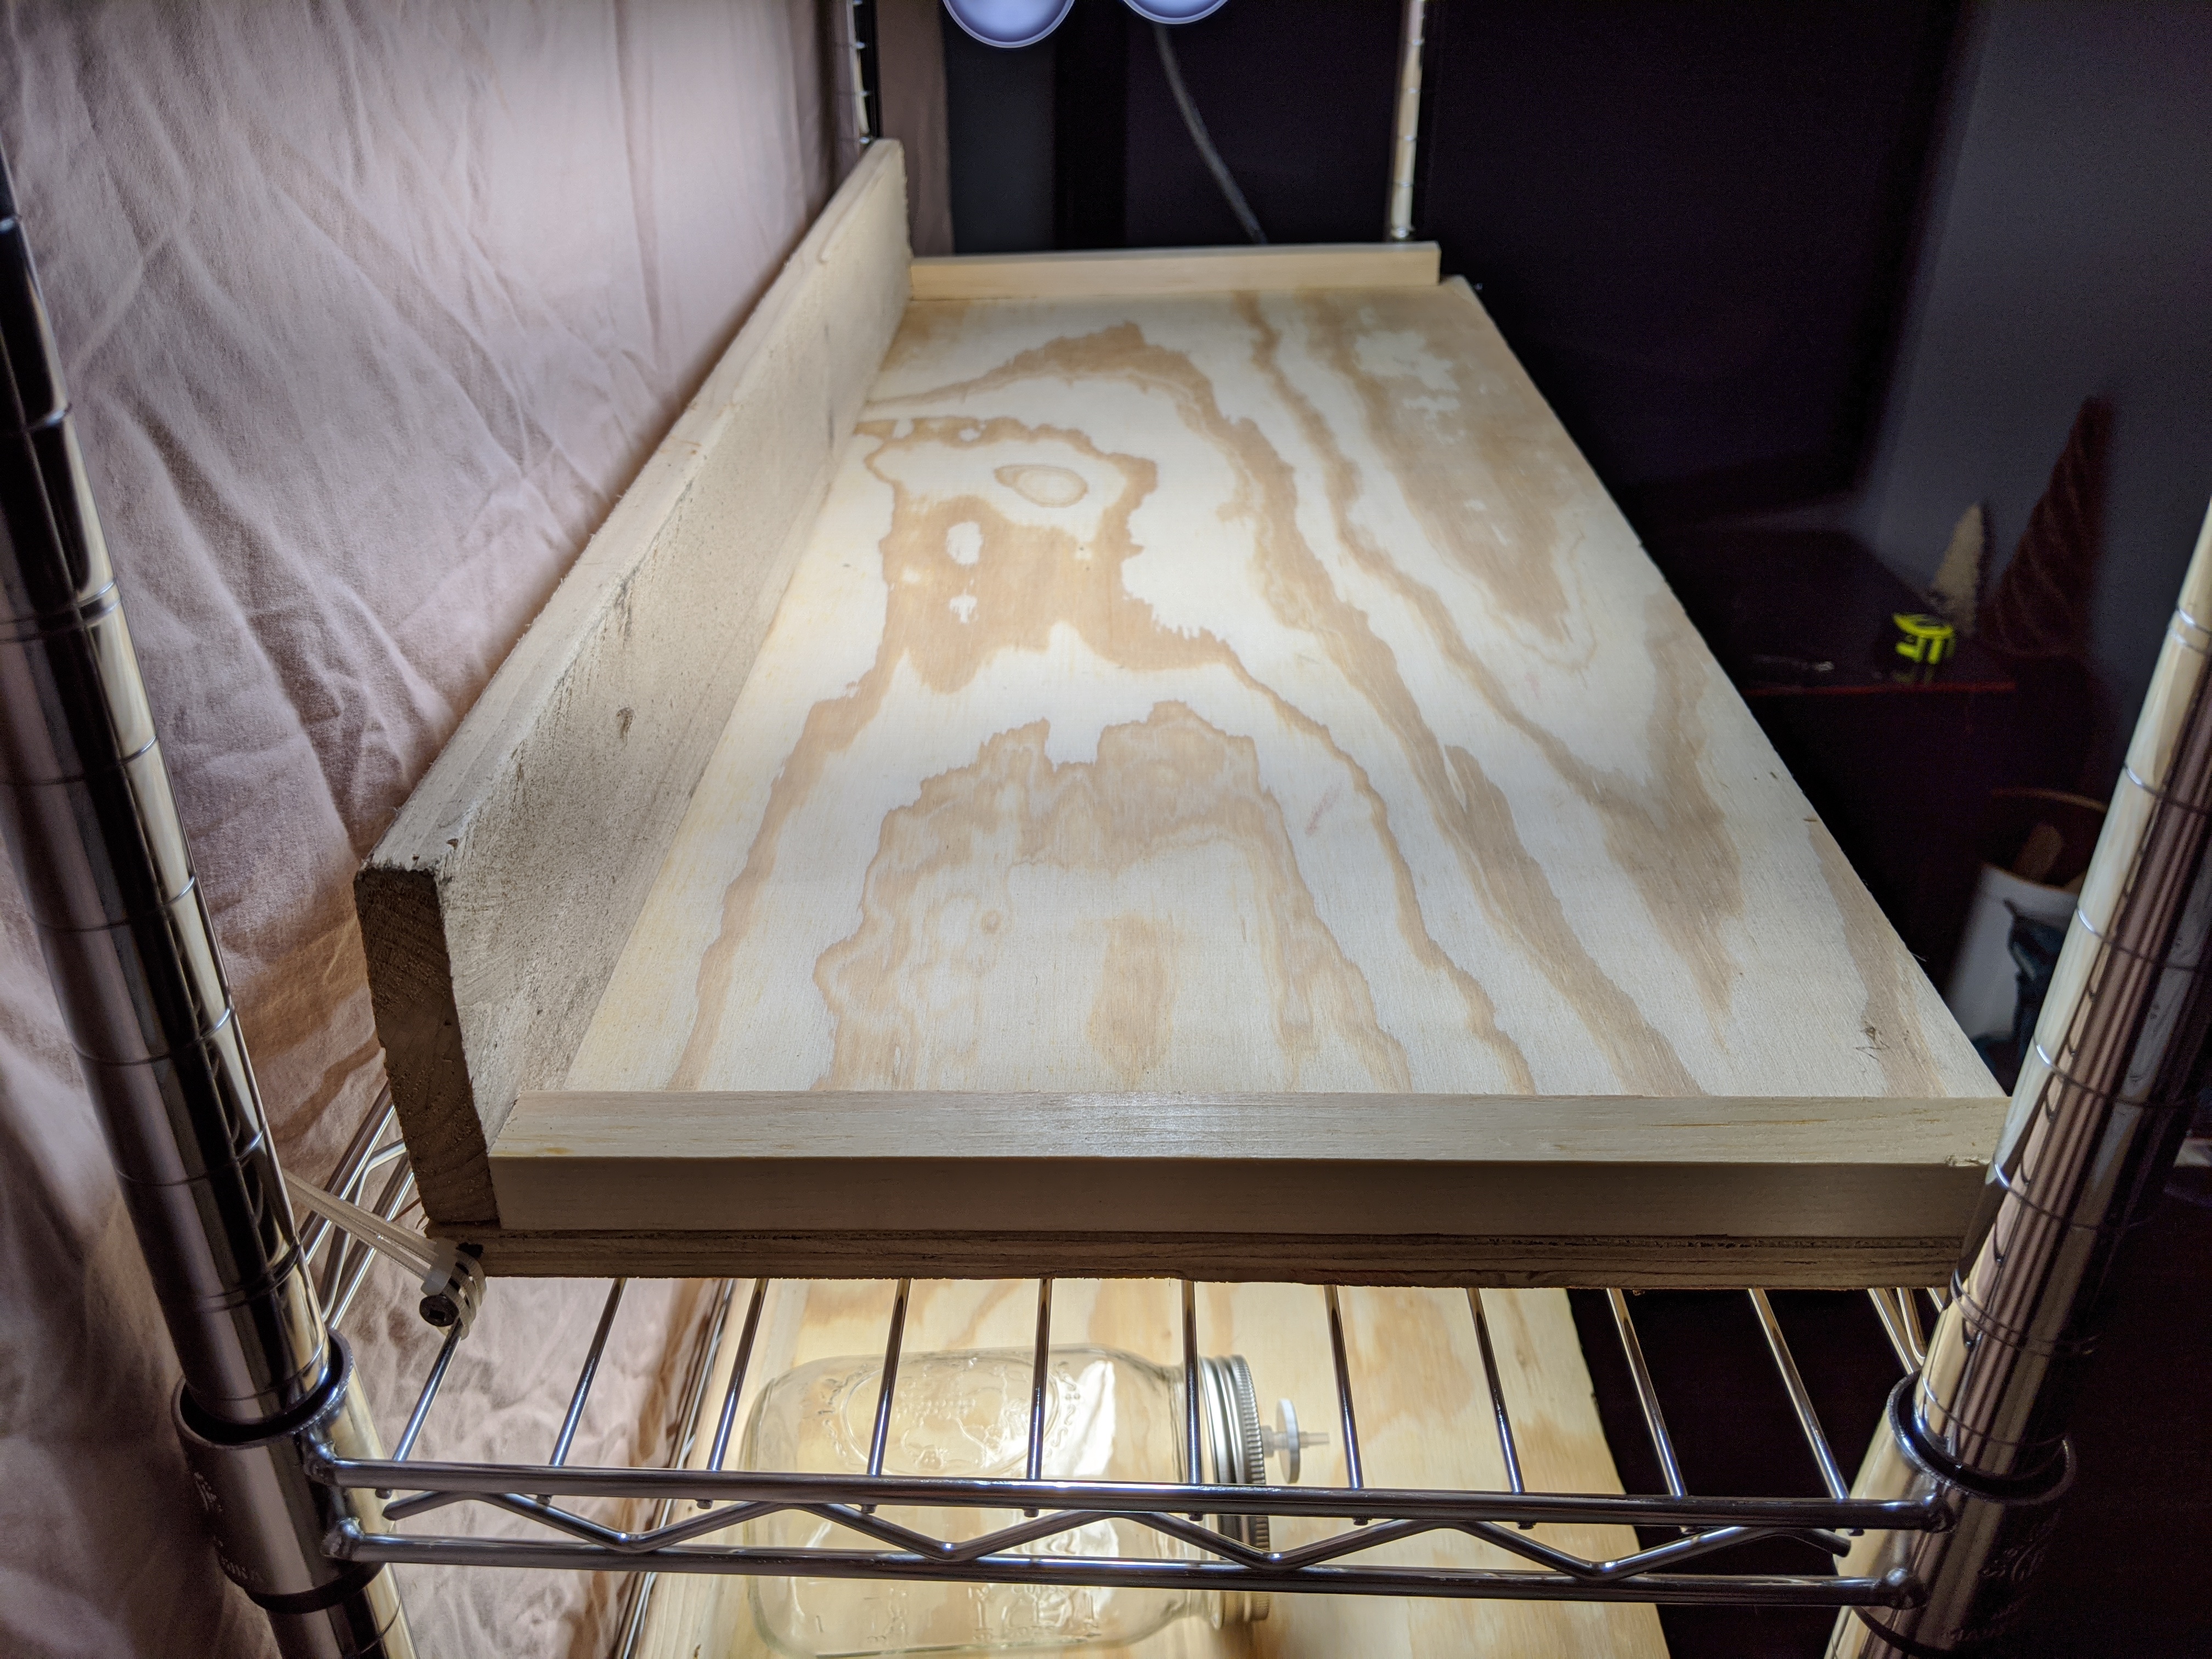
Assemble the
wooden tipping shelves by cutting 1/2" plywood into 32" by
14" rectangles. Also cut the 4" x 1" board into 32"
lengths. Align the long edges of the 4" by 1" board with
the plywood and affix with a screw or nail.
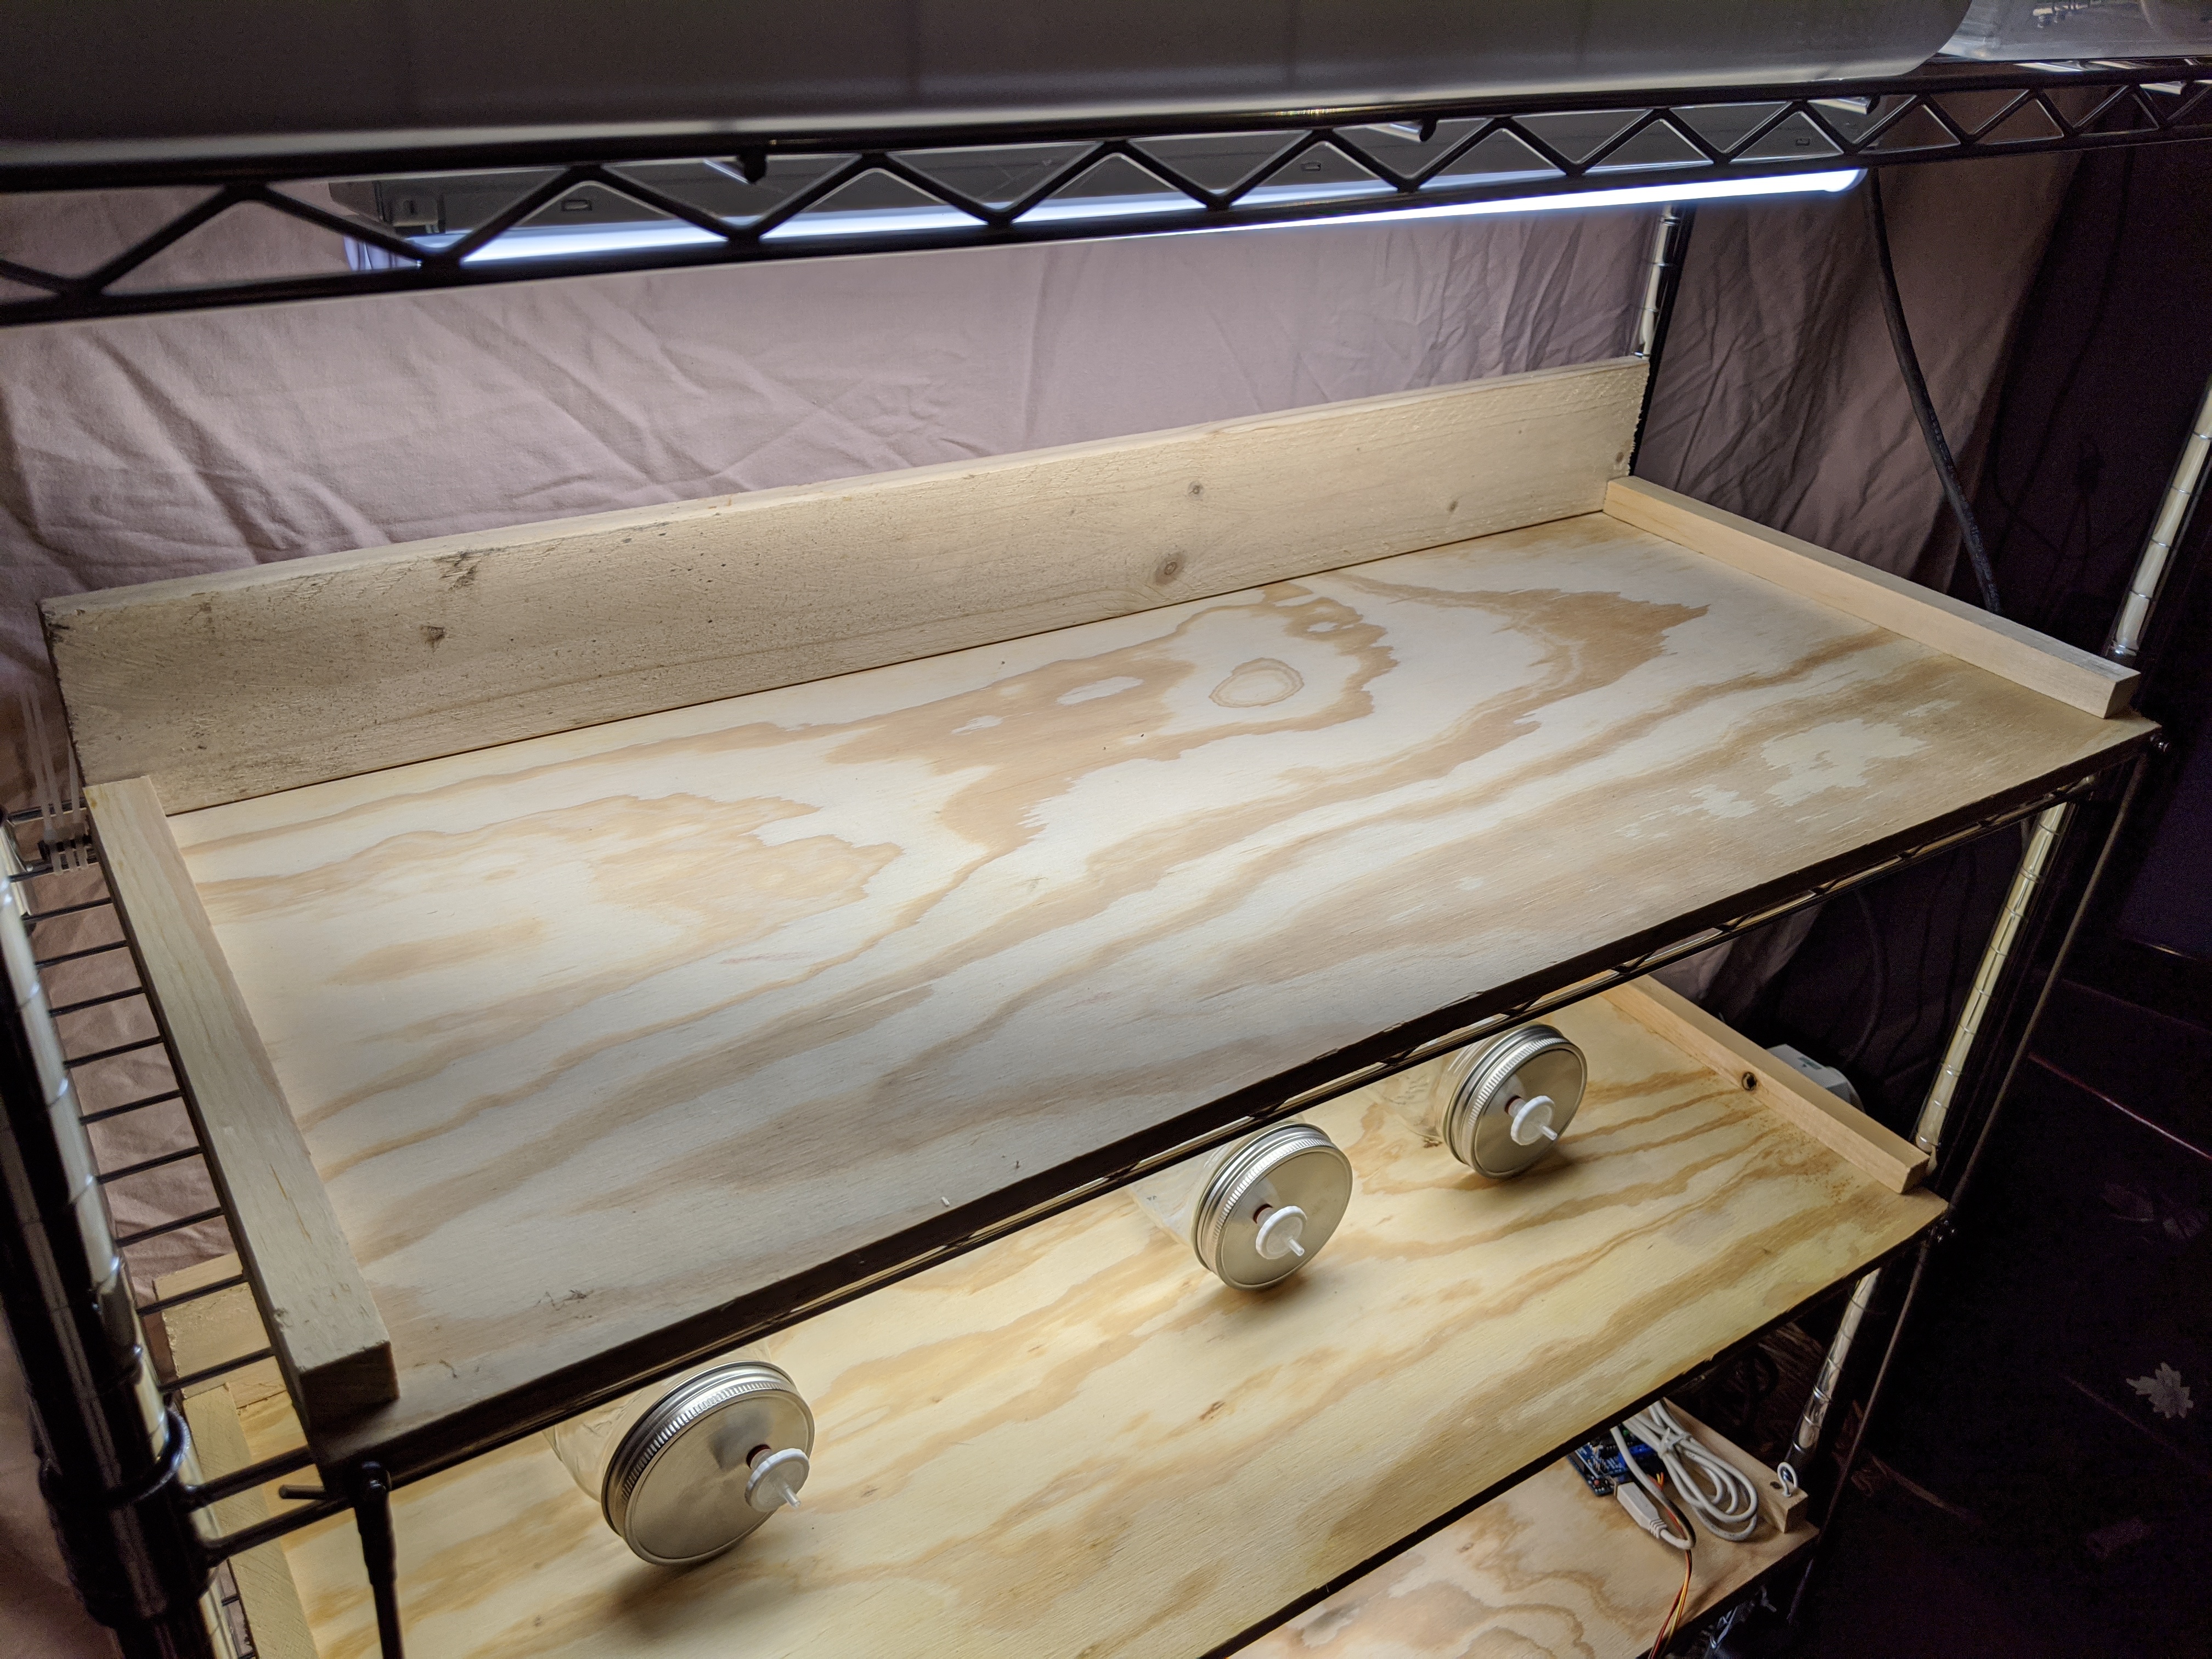
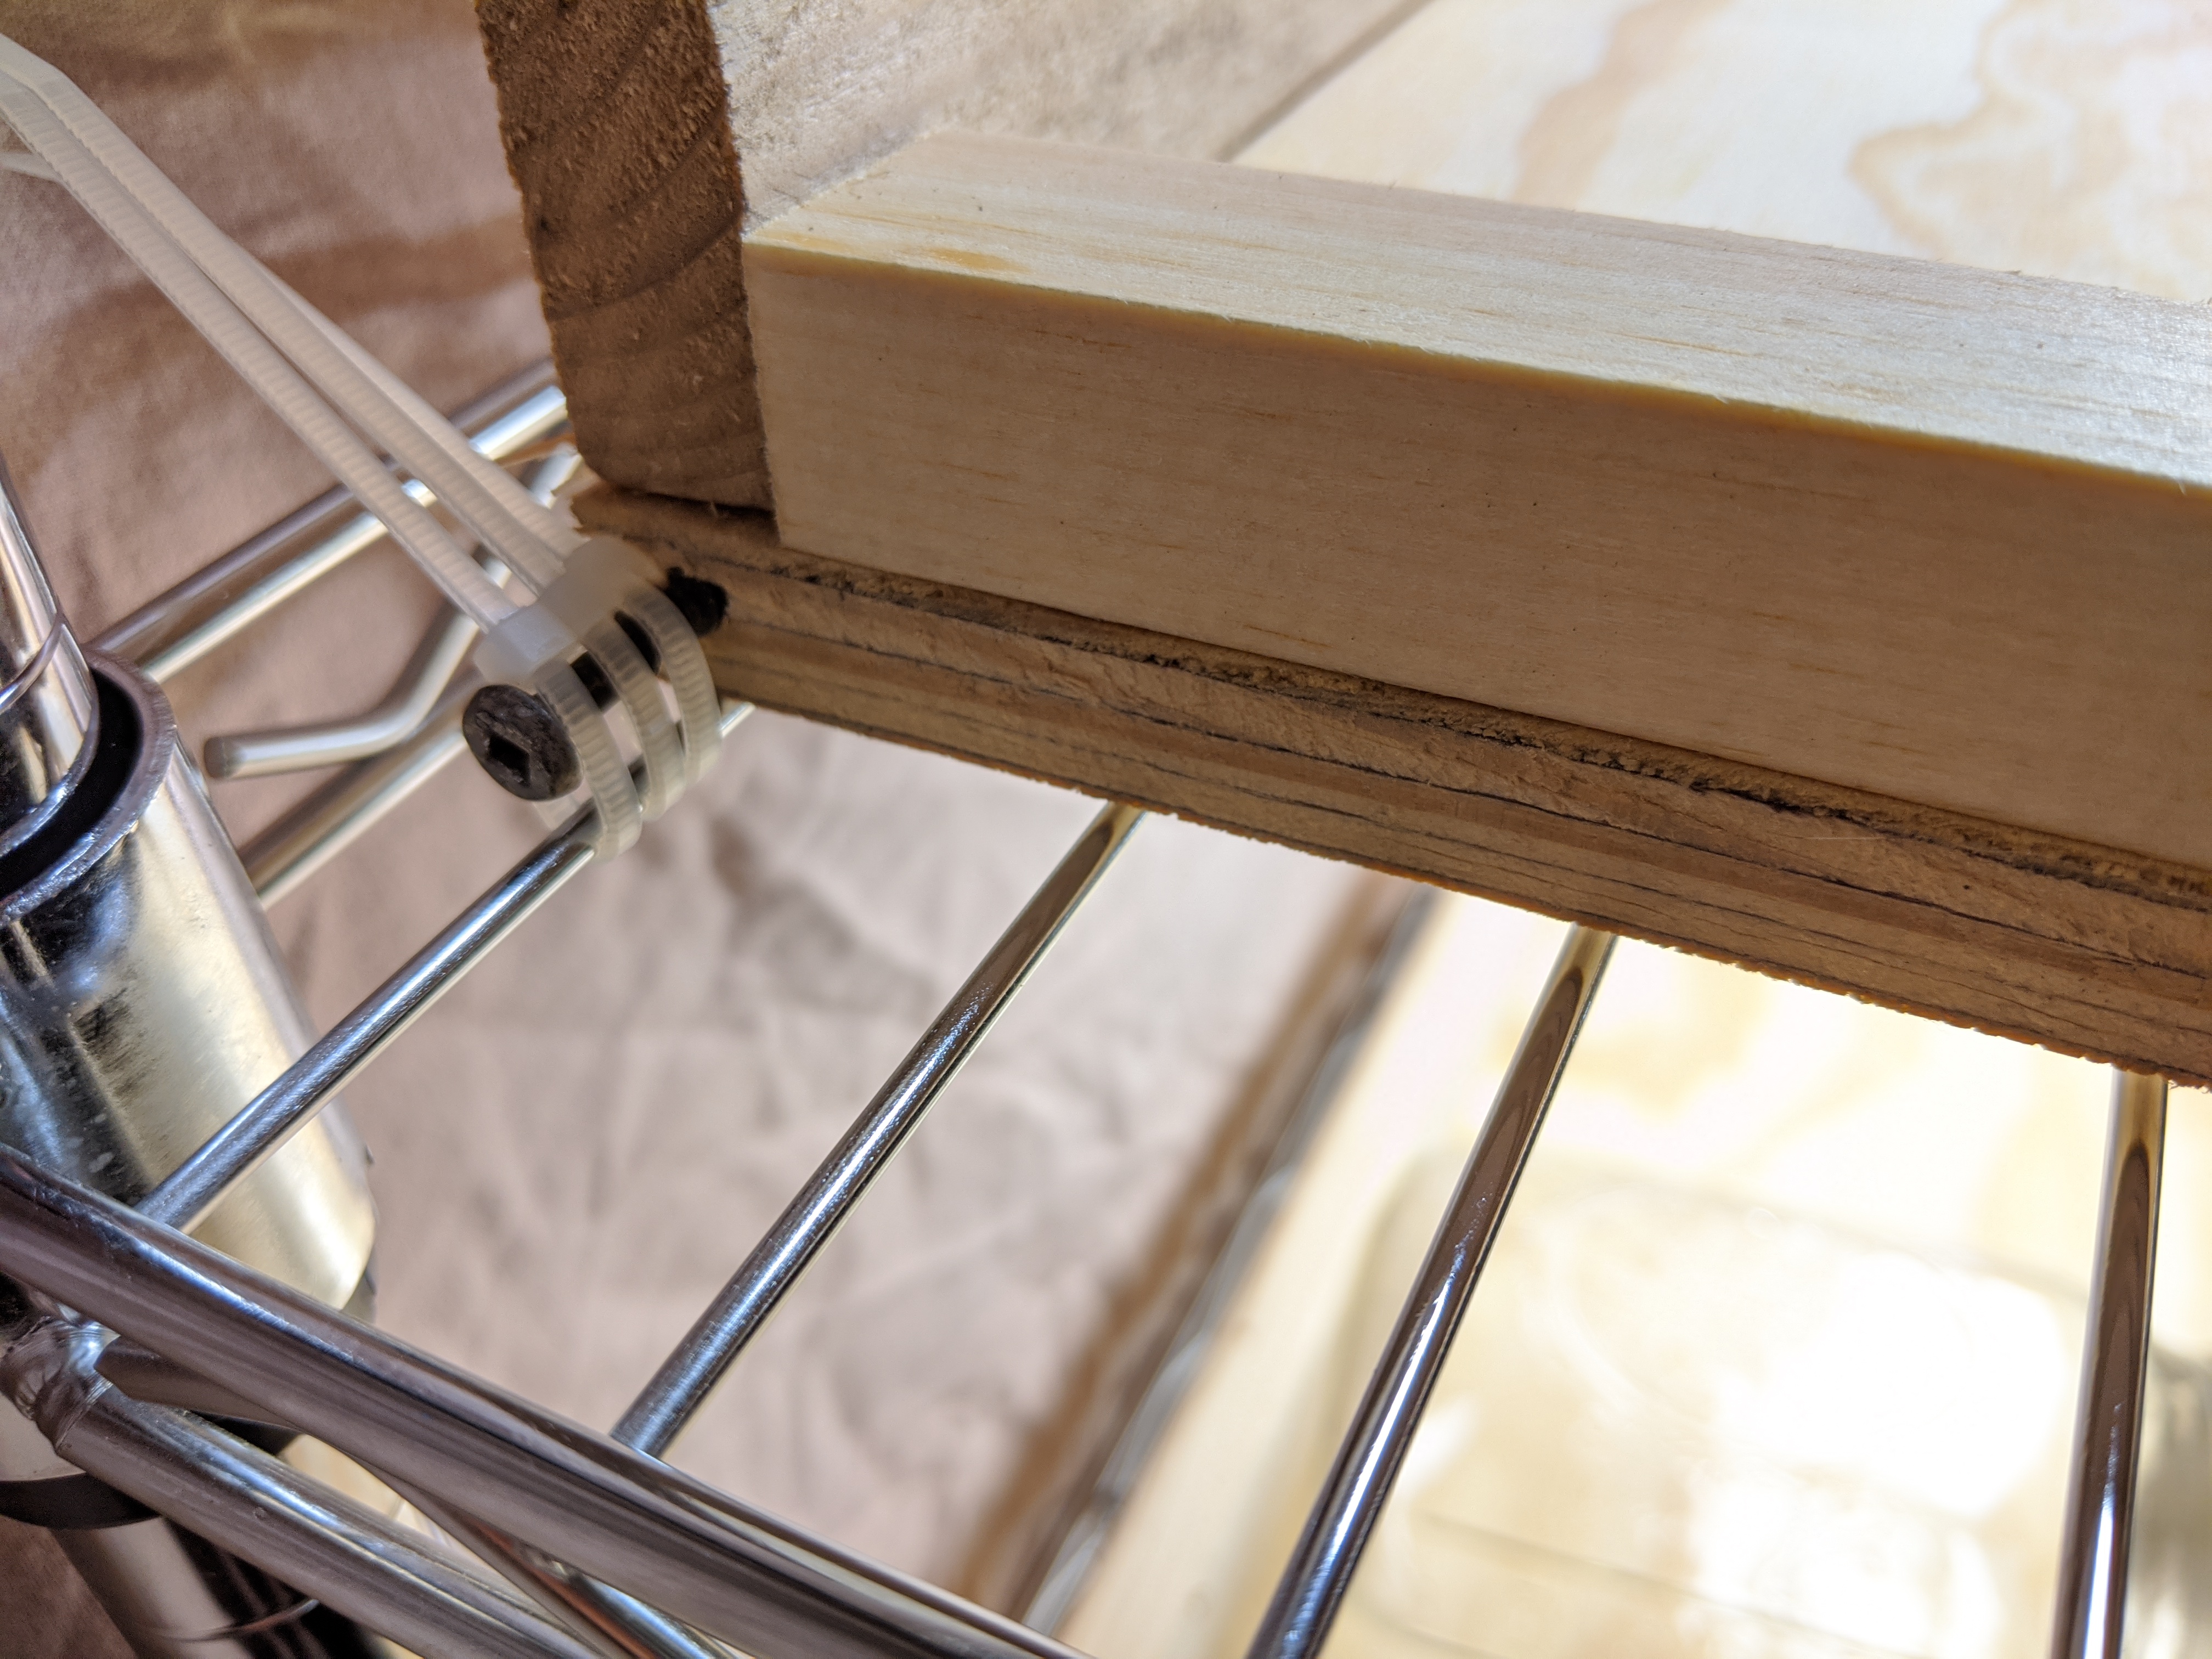
Scrap pieces of
wood can be nailed to either end of the shelf to prevent
jars from rolling off. A screw is inserted near the vertex
at either end of the boards to act as an anchor point for
the shelf to pivot. Zip ties anchor the tipping shelf to
the wire shelf.
Anchor the wooden
shelf to one side of the wire shelf using several zip ties
at each pivot point.
Cut a 4" section
off of the 2" by 1/8" aluminum bar and mark the center, at
2 inches. Place the stepper motor mounting bracket over
the aluminum bar and mark the position of 4 holes centered
on the 4" aluminum bar. Drill the 4 holes through the
aluminum bar large enough to accommodate an M8 bolt.
Sandwich the wire
shelf between the stepper motor mount bracket and the
aluminum bar at the middle and side of the wire shelf.
Place the M8 bolts through the holes in the aluminum bar
and the stepper motor mount bracket to affix the assembly
to the wire shelf.
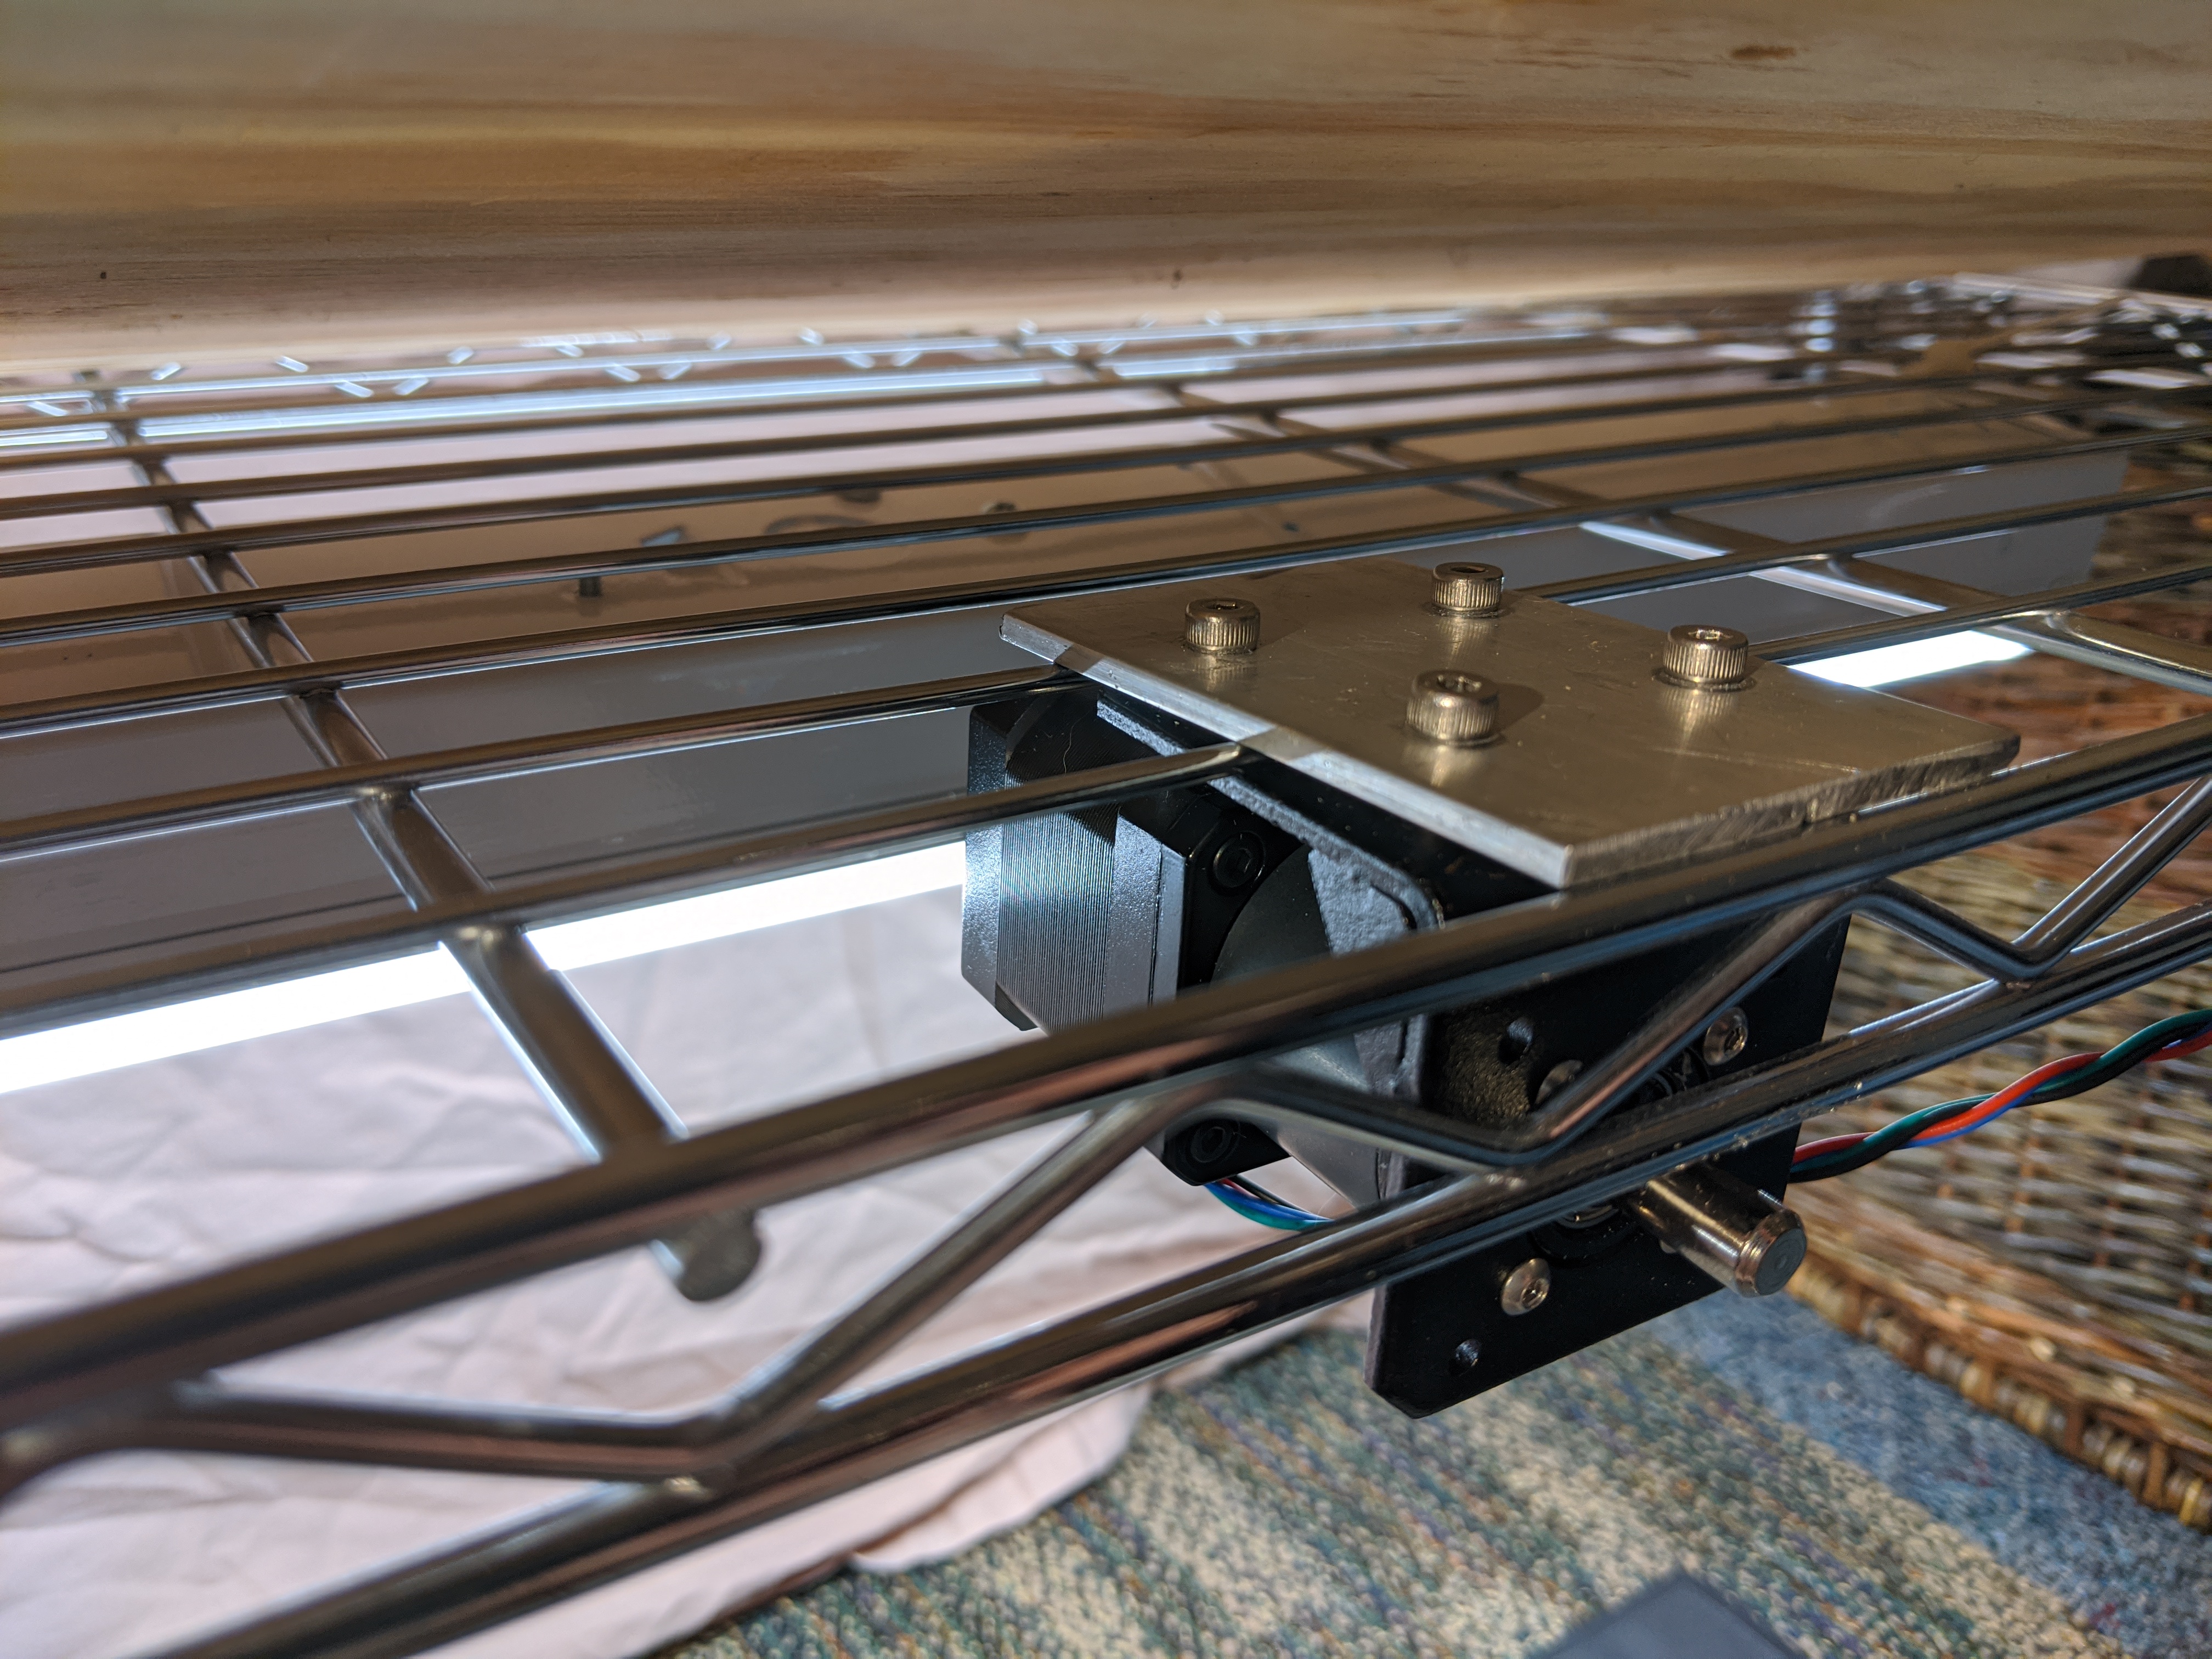
Use the 4 M3 bolts
to mount the stepper motor to the mounting bracket.
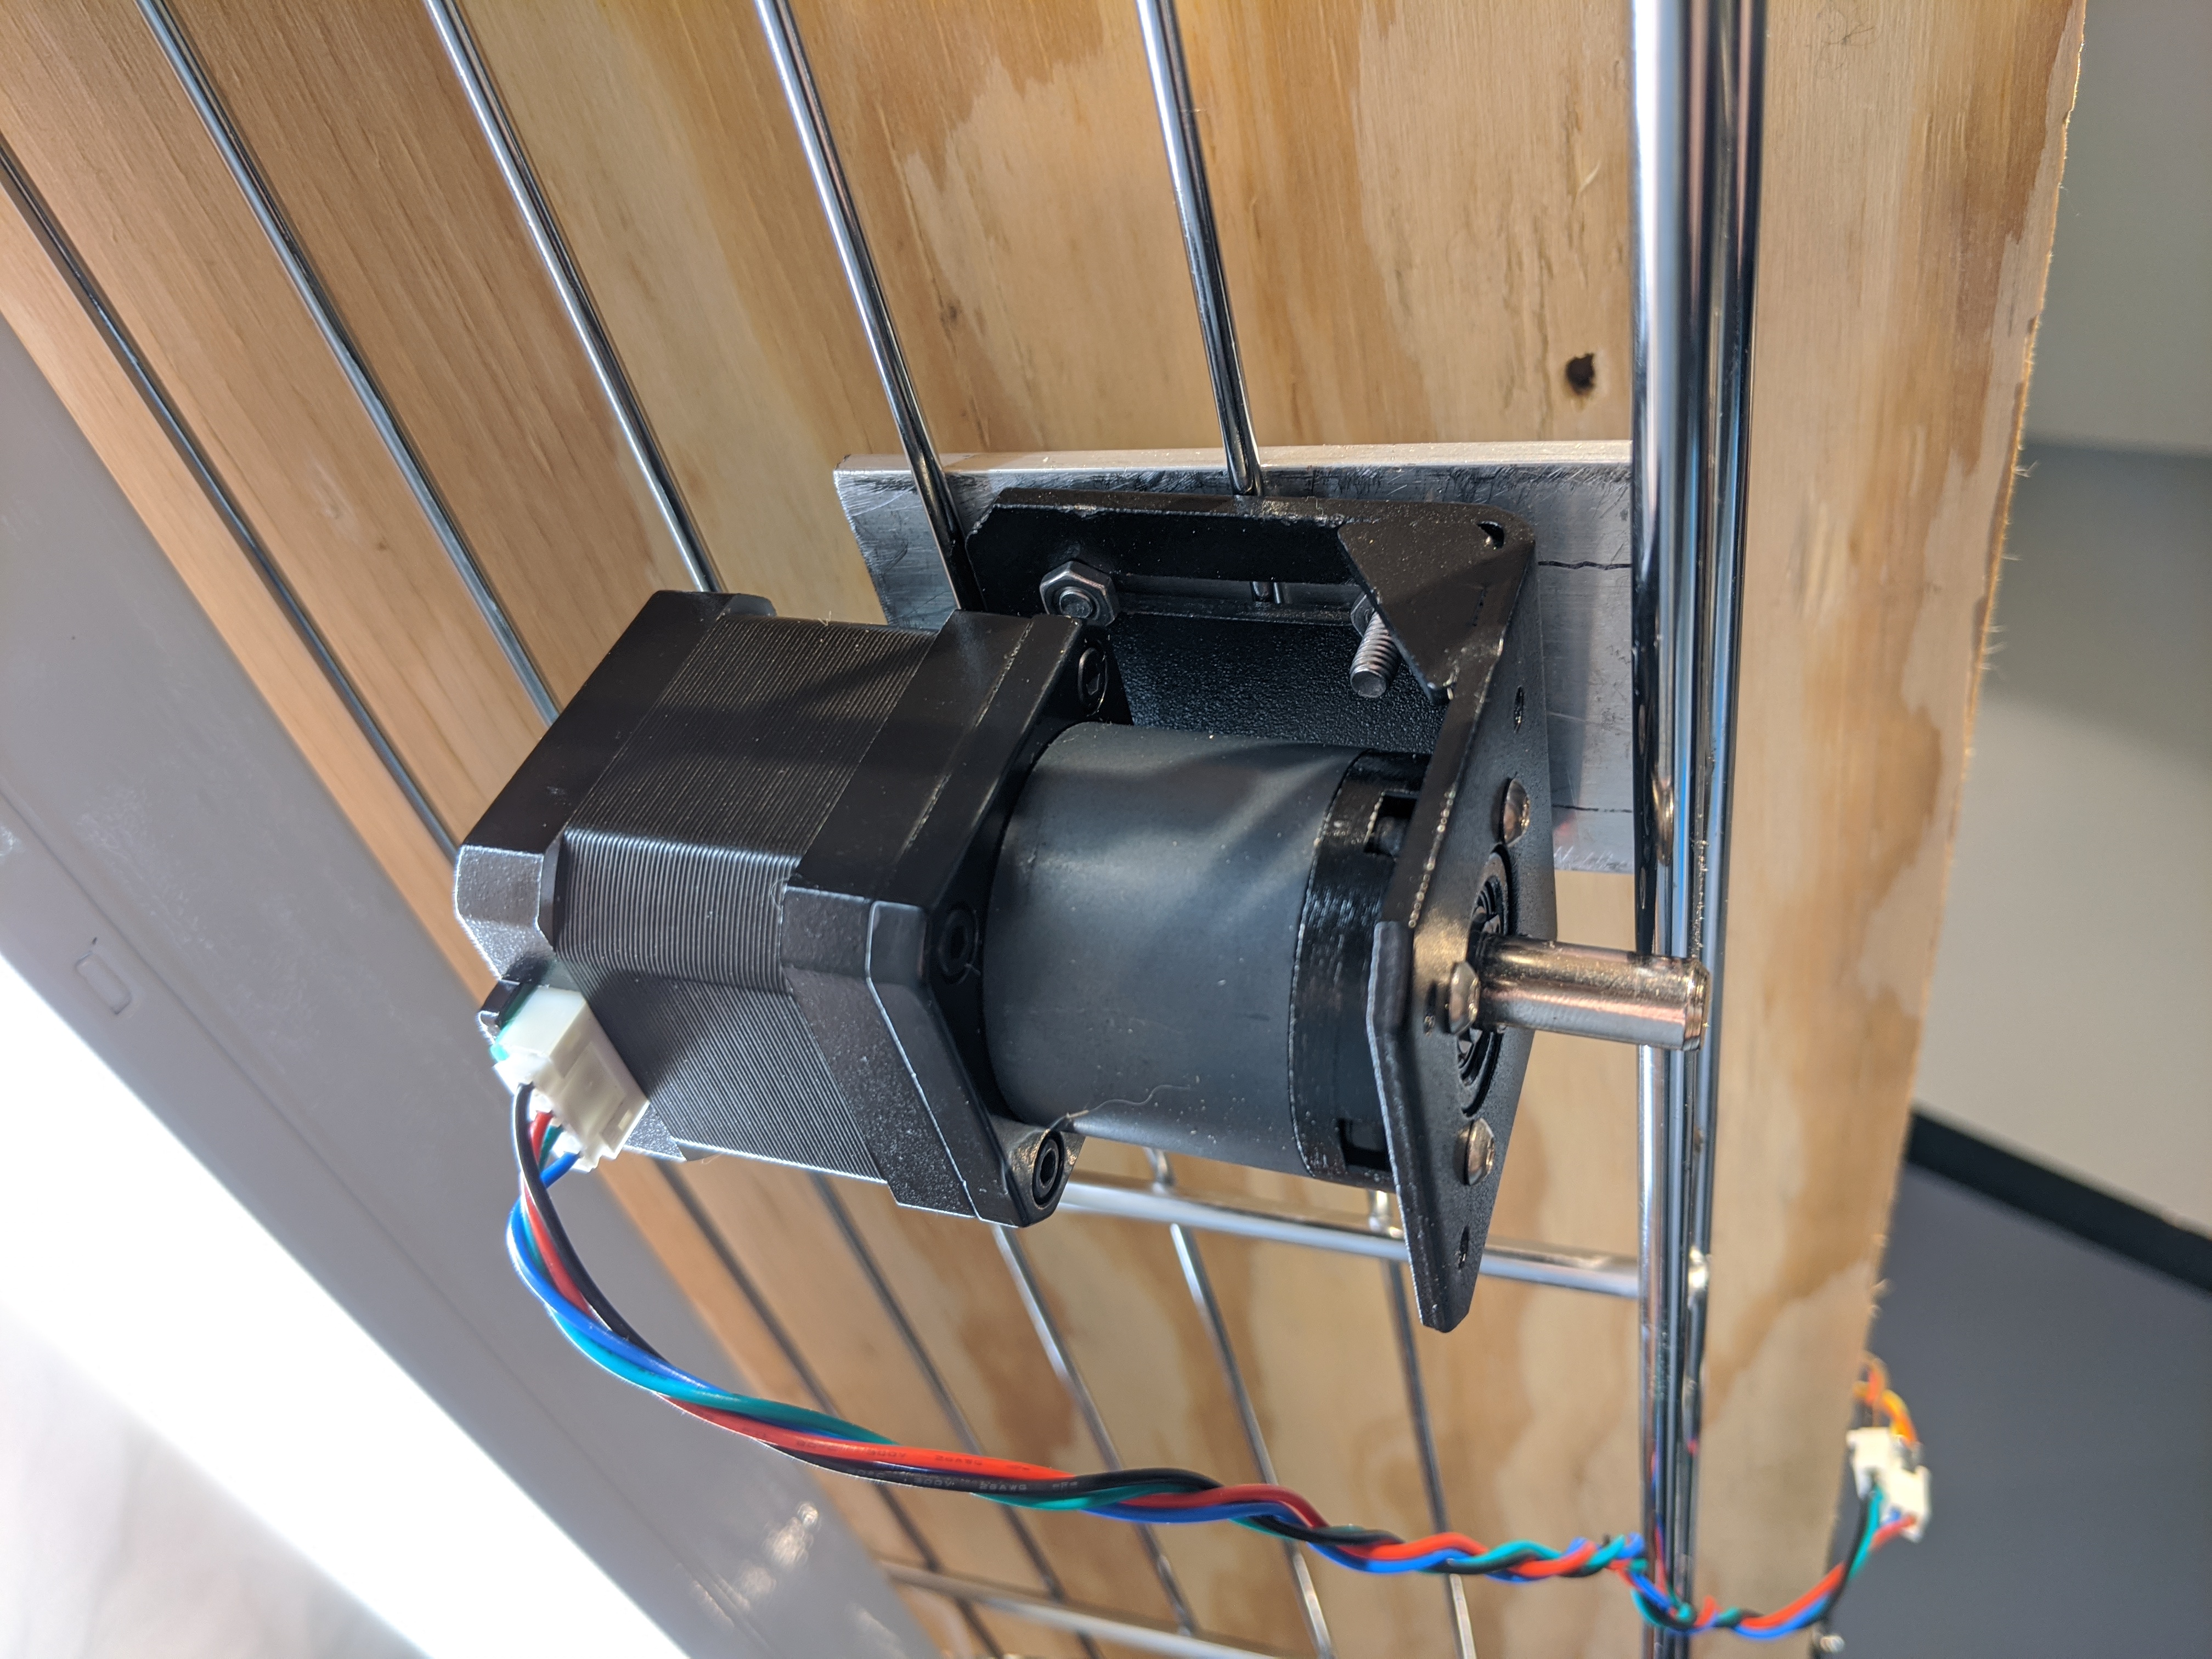
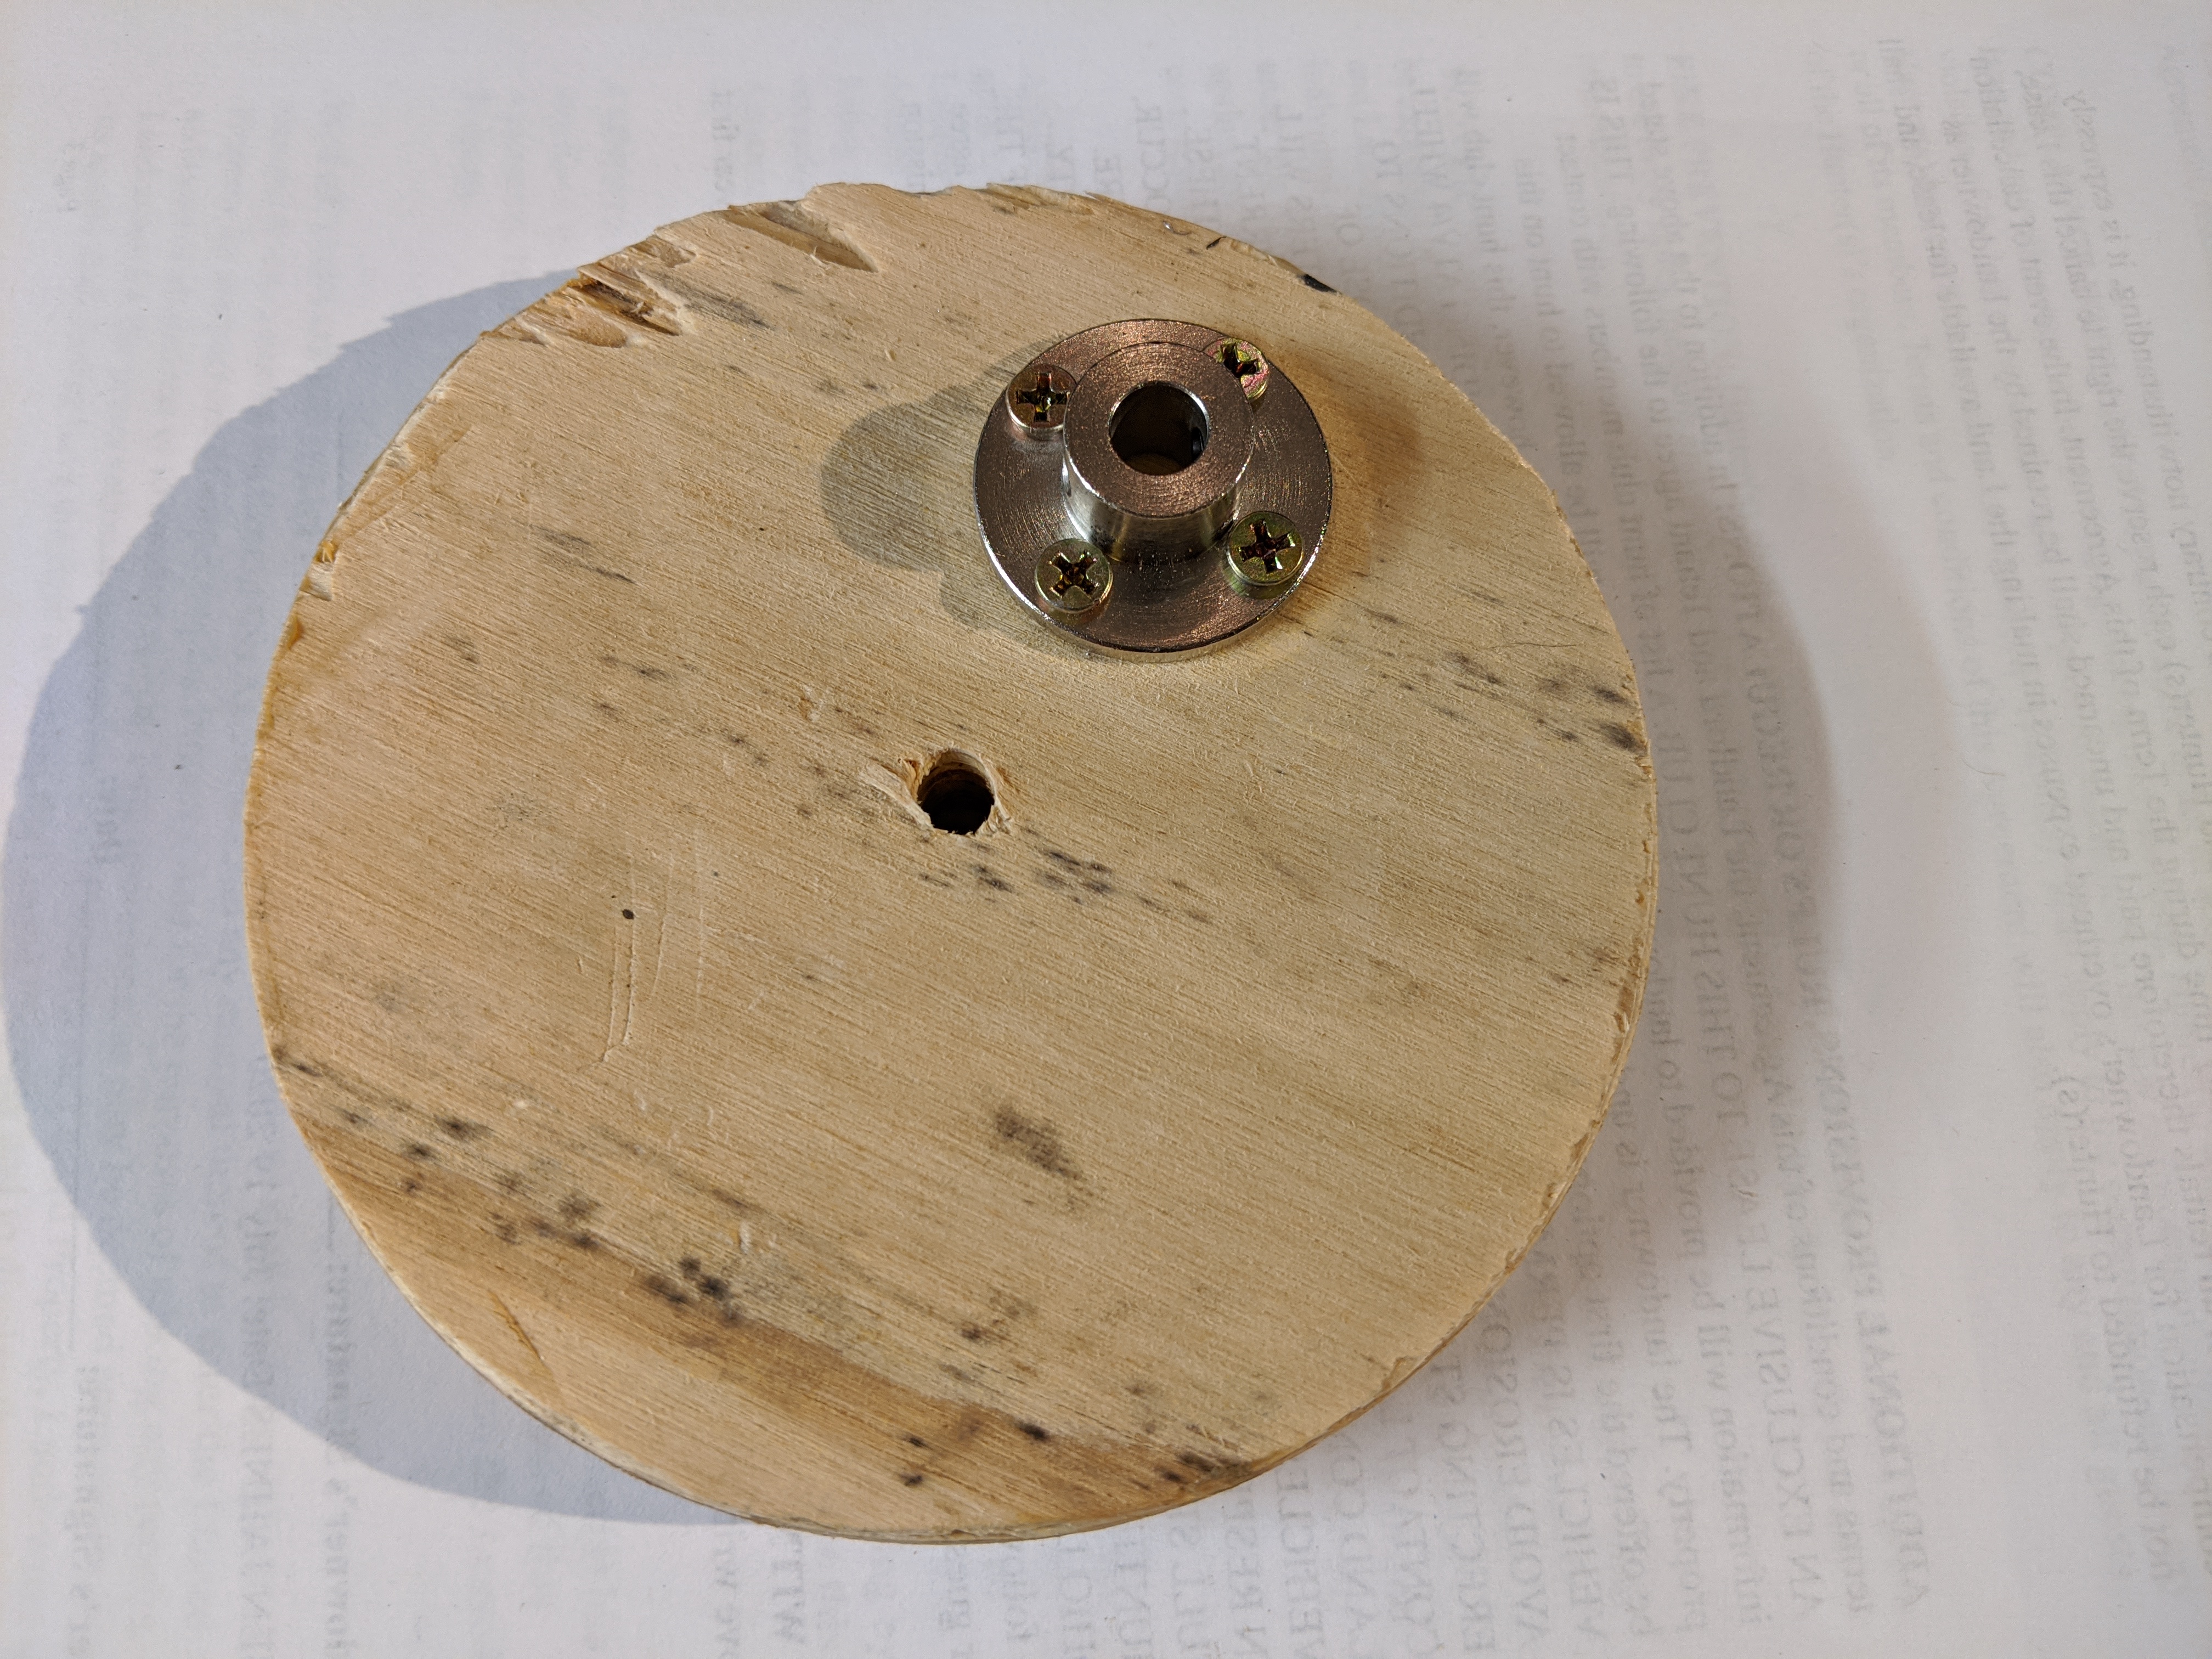
Cut a 5" circle
out of the 1/2" plywood and thoroughly sand the edge to
smooth the wood. Use 4 short wood screws to mount the
flange coupling connector to one side of the wood circle
so it will be turned eccentrically. This is the lifting
mechanism for the shelf. Mount this on the shaft of the
stepper motor ensuring that one set screw seats on the
flat side of the shaft.
Measure the
distance between two adjacent shelves, subtracting the
length of two of the Traxxas joints (2 x 5/8"). This
should be about 10-3/4". Cut two carbon tubes to this
length.
Wrap 1.5 cm of
each end of the carbon tube with thread to reinforce the
end. Soak the tread with cyanoacrylate (super glue). Use a
M4 tap to cut threads into the ends of the carbon tubes to
accept the M4 set screws.
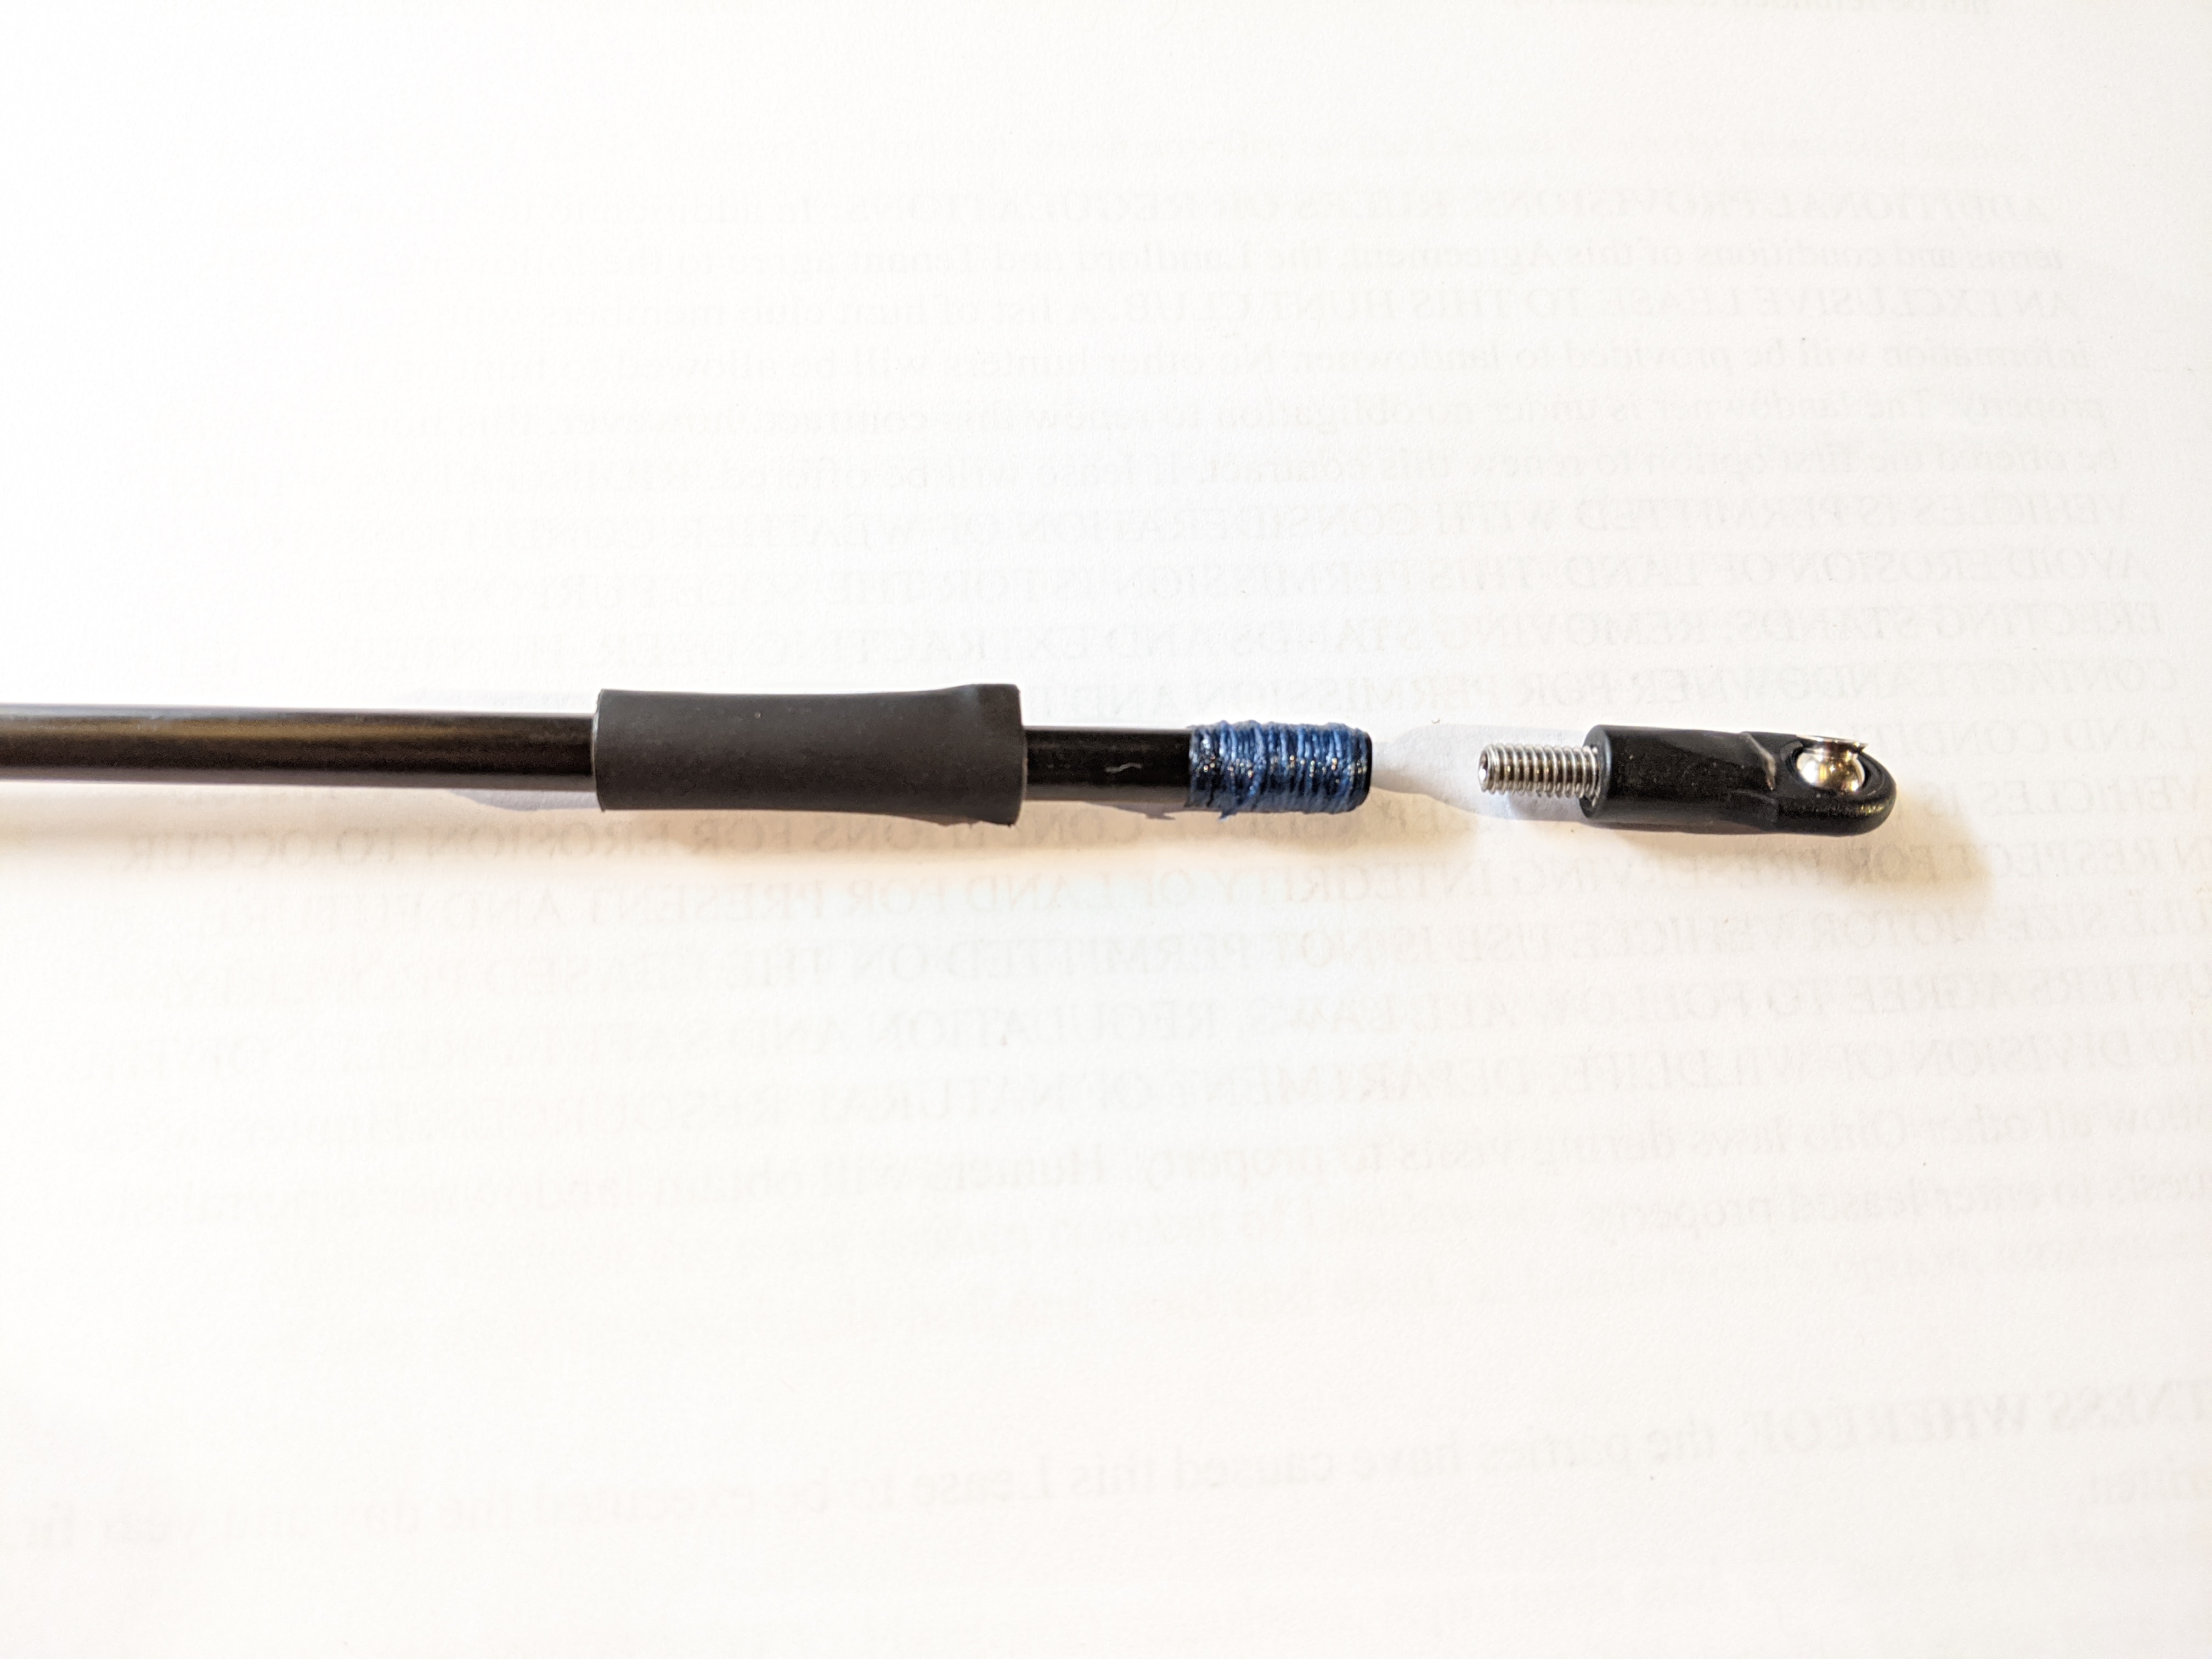
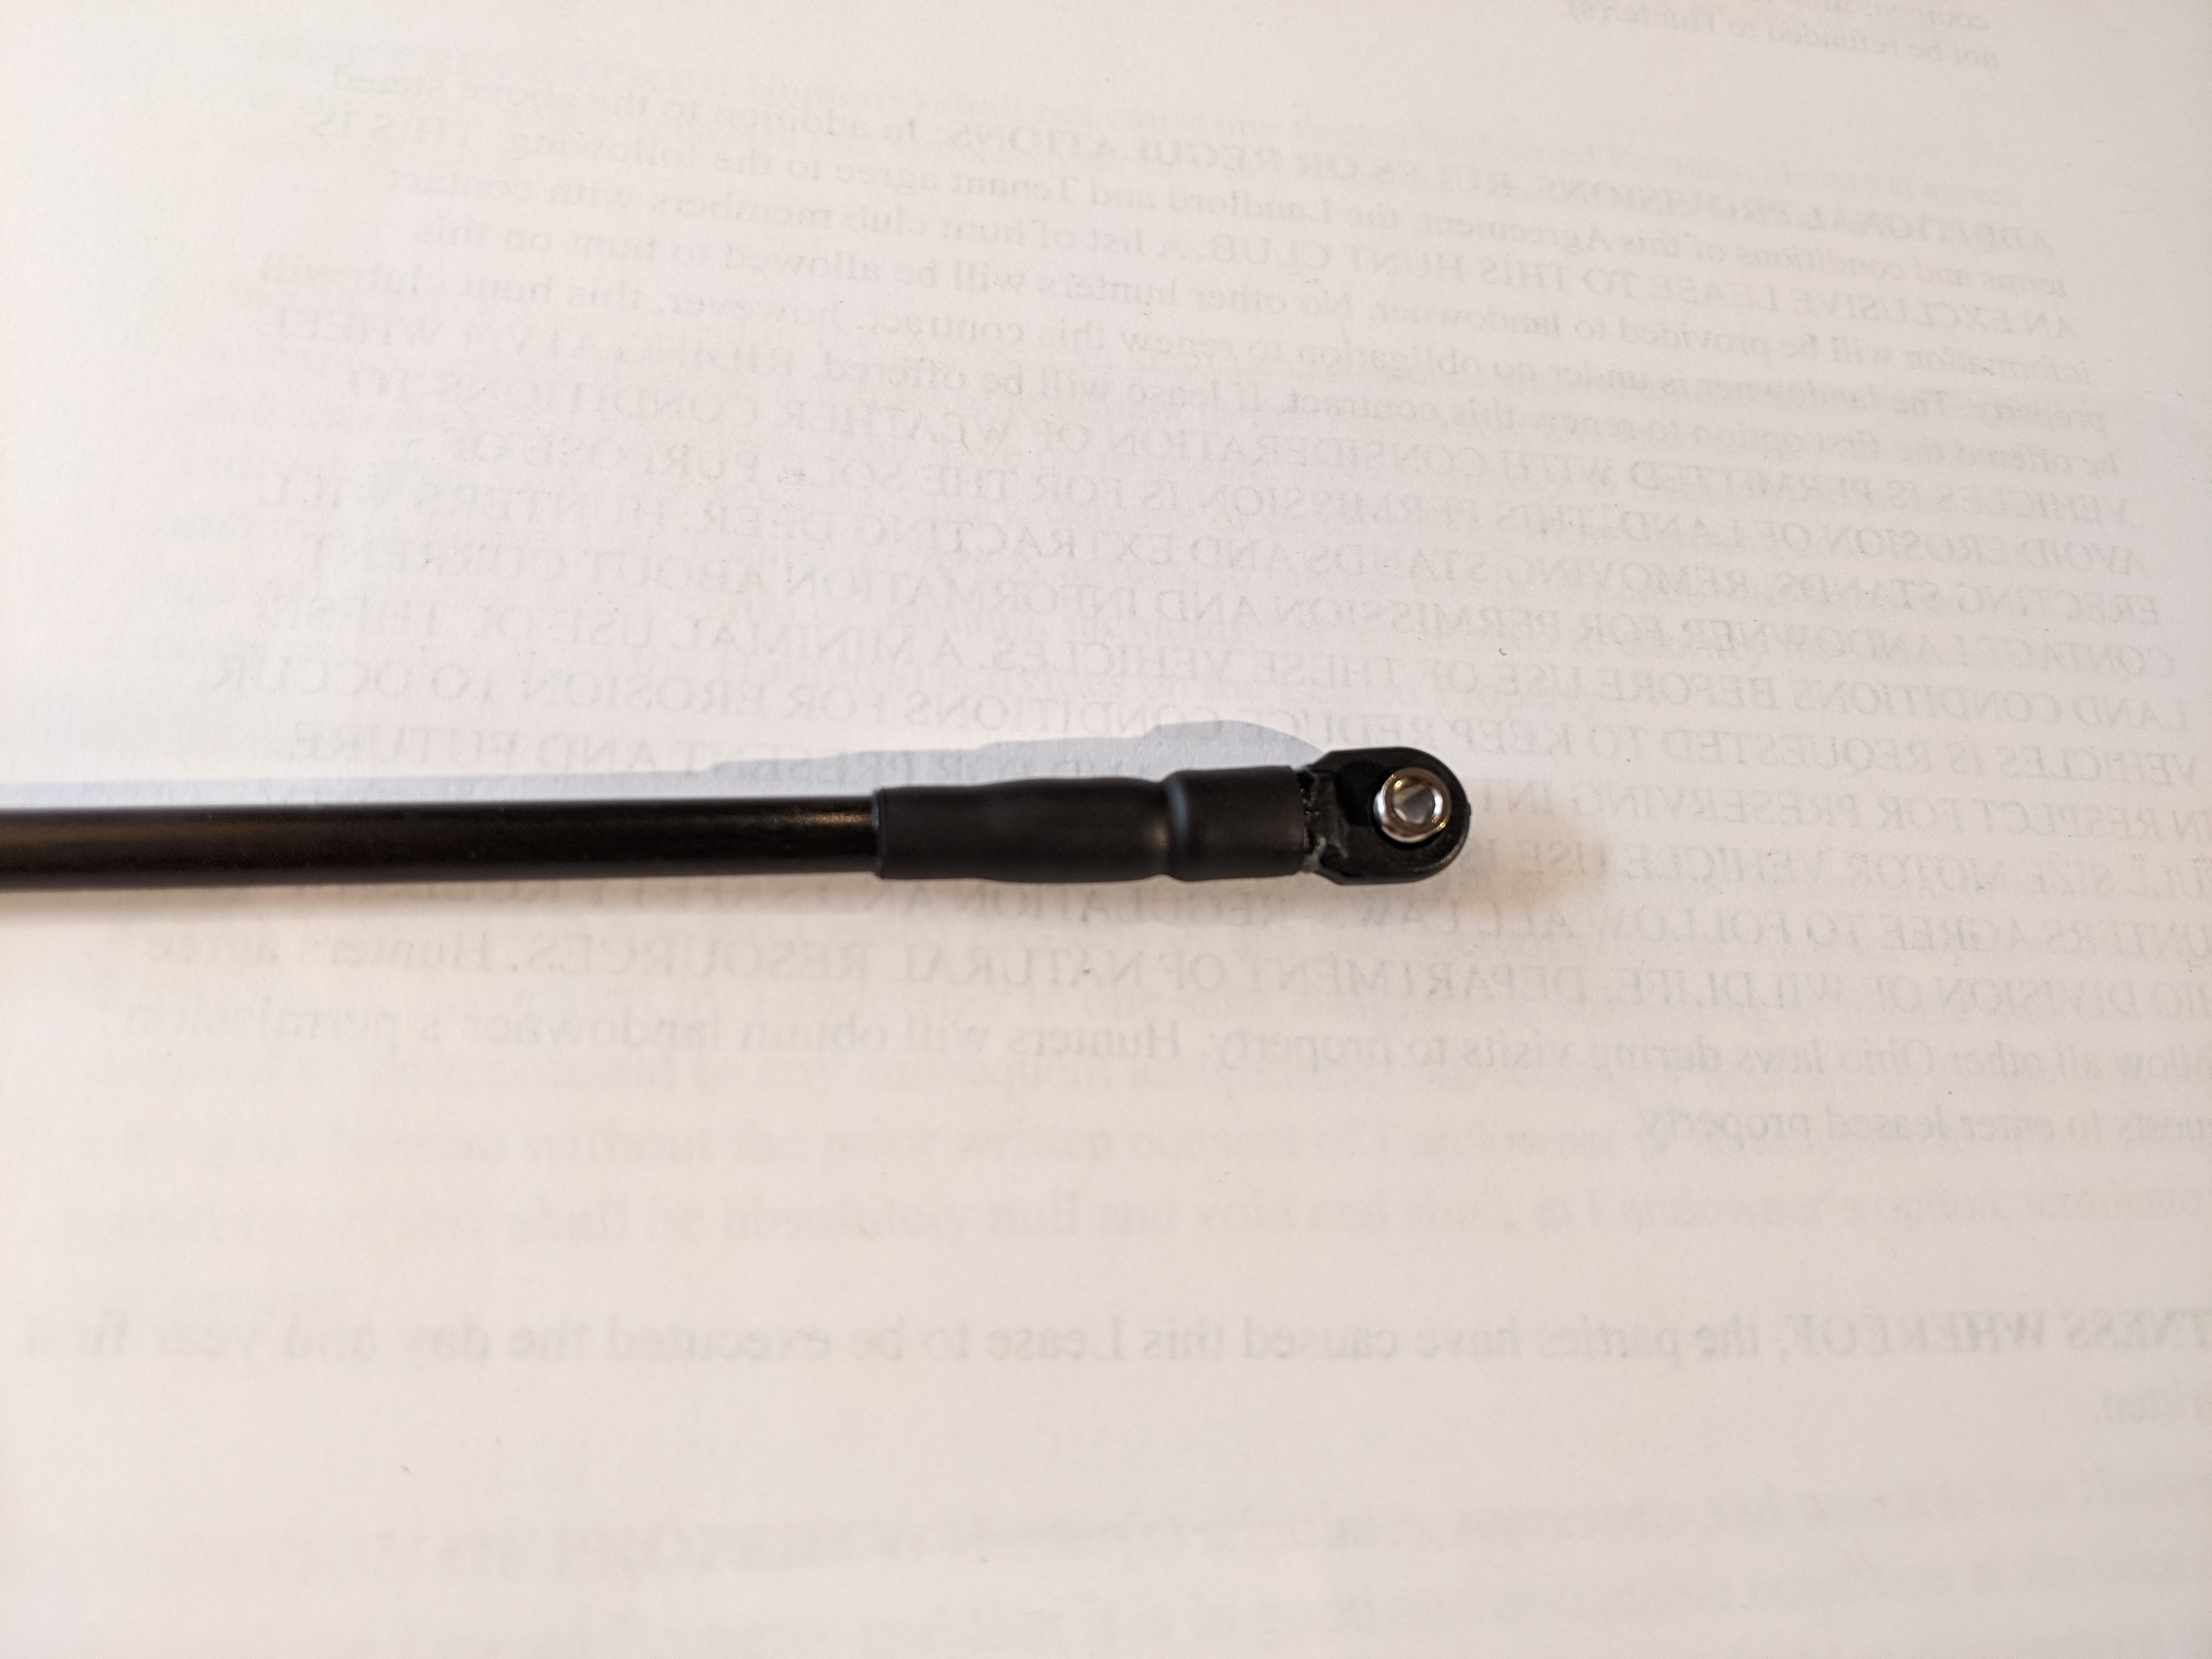
Screw the set
screw into the Traxxas ball joint. Slip two 1" long pieces
of heat-shrink tubing over the carbon tube and then screw
the Traxxas ball joints into each end to the carbon tube.
Use a hair dryer, heat gun, or flame to shrink the
heat-shrink tubing over both the Traxxas ball joint and
carbon tubing. This finished rod is called the "lift rod".
Screw two lift
rods into the far ends of two adjacent shelves. Repeat
this process with each pair of shelves. Your lift shelves
will finally all be linked to raise and lower in unison,
driven by the single drive wheel.

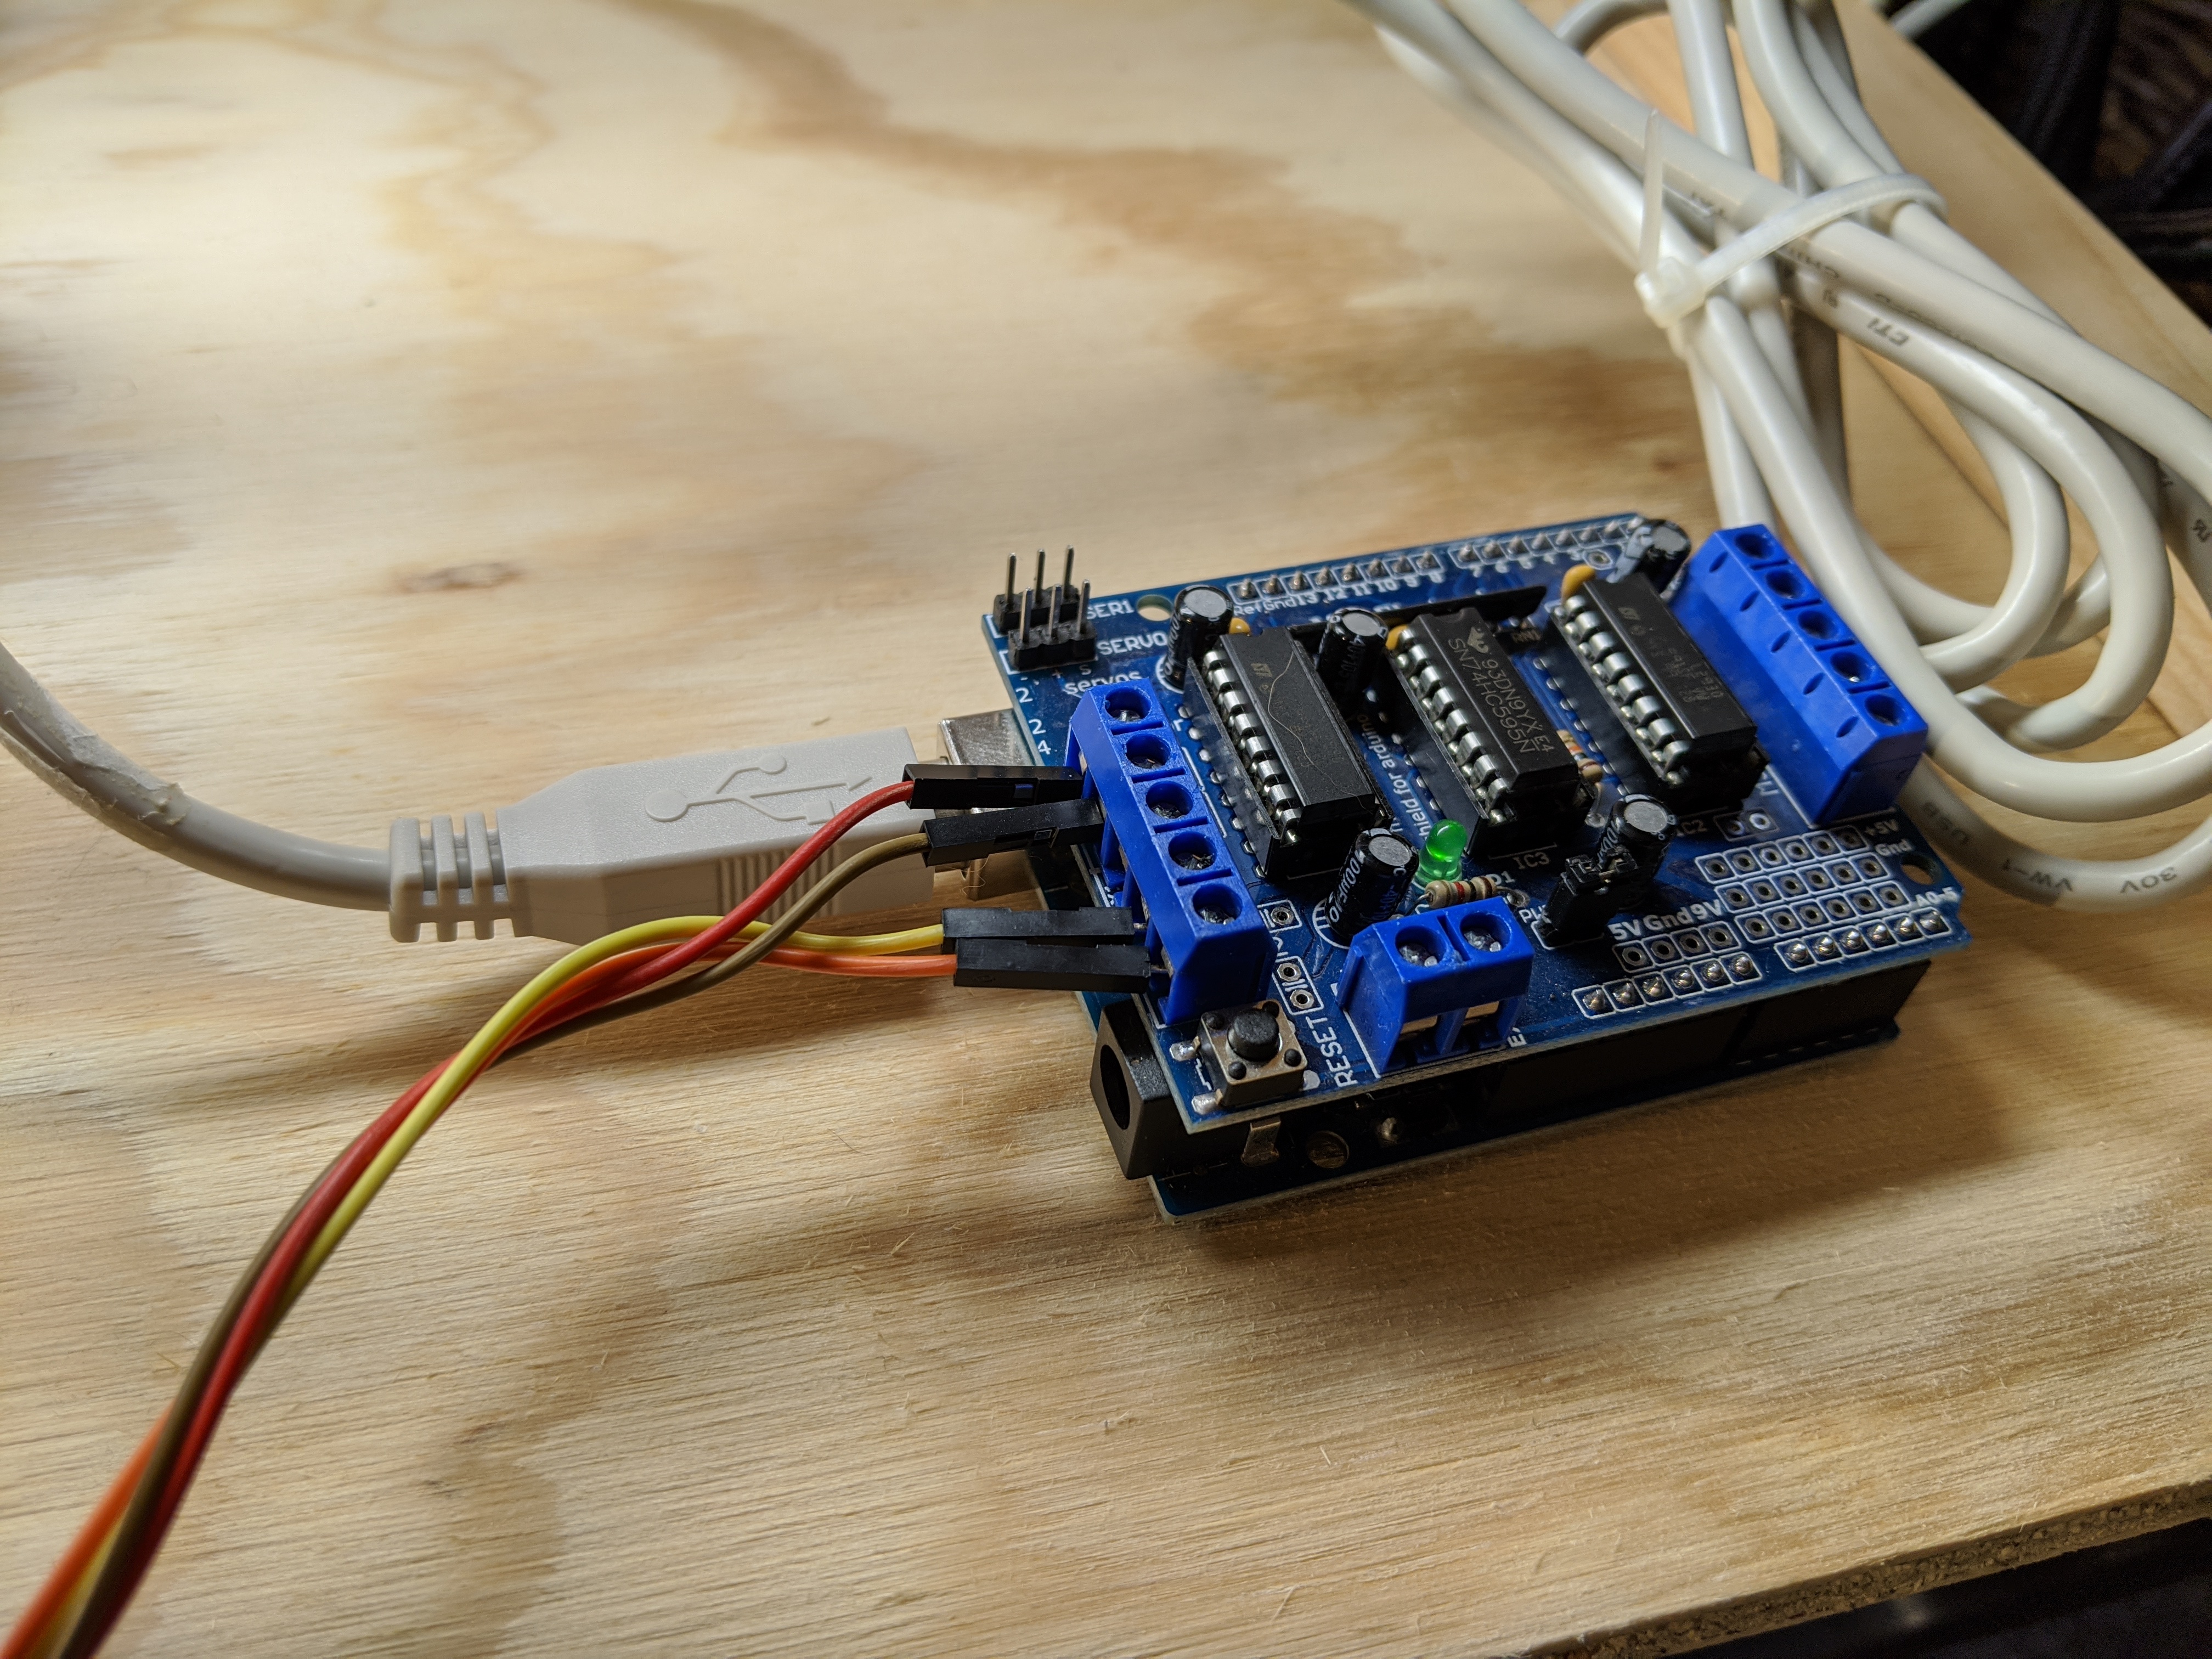
Mount the stepper
shield onto the Arduino and mount the wires in the 5
contact strip on the side of the stepper shield next to
the USB port. The black and green wire go in adjacent
connectors and blue and red wires go in adjacent
connectors, leaving the middle connector open.
Download Arduino
IDE to a computer and open a new sketch. Under the heading
"Tools" select "Manage Libraries" and install Adafruit
Motor Shield Library. Paste the following code into the
sketch.
//139:1 Stepper Motor Drive Sketch for Temporary Immersion Tilt Table

#include <AFMotor.h>

// to motor port #1 (M1 and M1)
AF_Stepper motor(100, 1);

void setup() {
  motor.setSpeed(50);  // 50 rpm
}

void loop() {

  motor.step(3500, BACKWARD, MICROSTEP); 	//Amount of rotation backwards. 3500 steps for 51:1 motor
  motor.step(3500, BACKWARD, MICROSTEP);        //10500 total steps for 139:1 motor
  motor.step(3500, BACKWARD, MICROSTEP);        //Steps must be broken into increments for large step numbers
  delay (60000);				//Soak time
  motor.step(3500, FORWARD, MICROSTEP); 	//Amount of rotation forwards
  motor.step(3500, FORWARD, MICROSTEP);
  motor.step(3500, FORWARD, MICROSTEP);
  motor.release();				//shuts off power to motor
  delay (3500000);  // 30min ~ 1500000		//Tilt time

  //This code down below is is for other step modes if you wish to experiment
  //Serial.println("Double coil steps");
  //motor.step(100, FORWARD, DOUBLE);
  //motor.step(100, BACKWARD, DOUBLE);

  //Serial.println("Interleave coil steps");
  //motor.step(100, FORWARD, INTERLEAVE);
  //motor.step(100, BACKWARD, INTERLEAVE);

  //Serial.println("Micrsostep steps");
  //motor.step(100, FORWARD, MICROSTEP);
  //motor.step(100, BACKWARD, MICROSTEP);
}
Connect your computer to the Arduino board with a USB cable, select the proper COM port and Board under the "Tools" tab. Select "Verify" and then select "Upload" to upload the sketch to your Arduino board. The motor should now begin to turn. Unplugging the USB chord will reset the sketch, so you can allow the wheel to rotate and unplug when the wheel and shelf are at their highest position. Adjust the "Soak time" and "Tilt time" to achieve your desired results and then re-upload the sketch.
Jar lids must be drilled with a 1/4" drill bit to allow the bulkhead adapter and 0.22 micron filter to be attached. Use a silicon o-ring to seal the bulkead fitting.
Dump a small
amount of pebbles into the mason jar so they are two
pebbles deep on the bottom of the jar. Mix up nutrient
medium and pour between 25 and 30 ml of medium into the
mason jar. Loosely attach the lid and autoclave it in a
pressure cooker for 15 minutes at 15 psi.

In a laminar flow
hood or other protected place, shake pebbles and medium
onto the side of the jar. Cut explant into nodal cuttings
and poke the nodal cuttings into the pebbles in the half
of the mason jar next to the jar opening. Close the lid
firmly and place the jar on the tipping shelf and be sure
that the tipping cycle is operating appropriately.
Happy Growing!
Relevant Literature:
An efficient temporary immersion system for micropropagation of hybrid hazelnut